Exporting and Sharing Workflows
Half the fun of creating amazingly useful workflows is knowing that, once you've completed your masterpiece, you can share it with fellow Alfred Powerpack users; work colleagues, friends, family members, who will all benefit from your genius!
We've created this guide to help you prepare your workflow for sharing; Take a look, then be sure to share your workflows and join the conversation on the Alfred forum.
Documenting Your Workflow
In most cases, when a user imports a new workflow, it's up to them to work out how to use the workflow; Triggers and inputs like keywords are easy to figure out, but sometimes the workflows are more advanced and require a little explanation.
In other cases, the user may need to add their own folders to a search scope, or add an API key to access a web service.
Essential Information
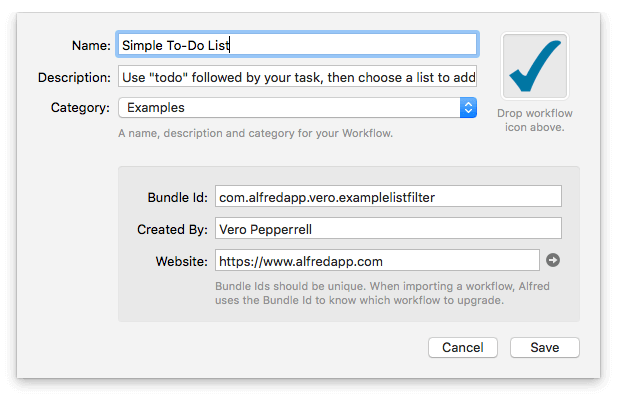
When creating a new workflow, the first window you'll see is the one requiring essential information.
- Title: Give your workflow a useful title
- Description: A useful description or hint on how to get started will put the user on the right track!
- Category: This is only for your own organisation, as this information is stripped when exporting so that the user can choose their own ideal category
- Bundle ID: Set a bundle ID that is unique to your workflow, ensuring Alfred recognises the workflow if you issue an updated version later on. The com.yourname.yourworkflowname format is frequently used.
- Created By & Website: Add your name and a URL where users can find more information or say thanks!

About This Workflow
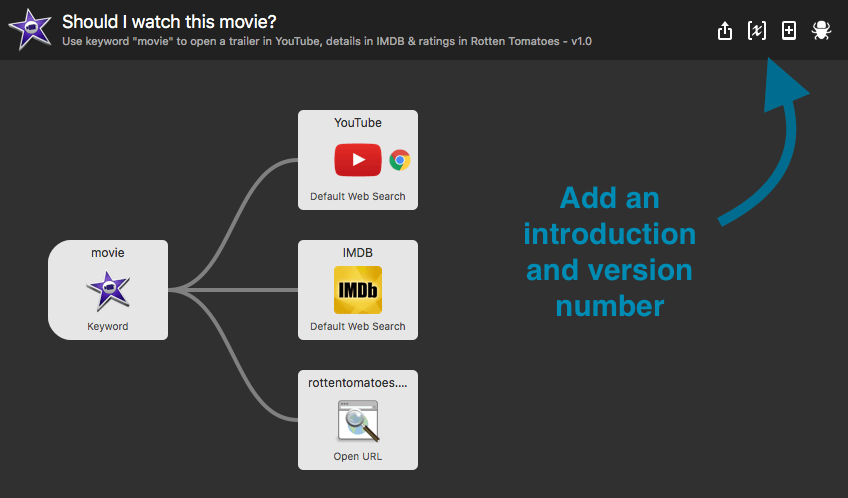
It's useful to add pointers for users of your workflow. You can do this by clicking on the [x] variable icon in the top right of the workflow.

In this section, you can add three types of information:
- About This Workflow: Add an introduction to your workflow. This will be shown when the workflow is imported.
- Version number: It's recommended to include a version number, making it easy to later identify which version users are running.
- Configuration Builder: If users need to set paths, API keys or any other information used elsewhere in the workflow, this is a great place to do it so that users don't need to dig inside scripts. Learn more about adding configuration in worflows.
- Workflow Environment Variables: If you want to set global values to reference throughout the Workflow that users should not modify. Learn more about using Variables in workflows.
Using Notes in Workflows
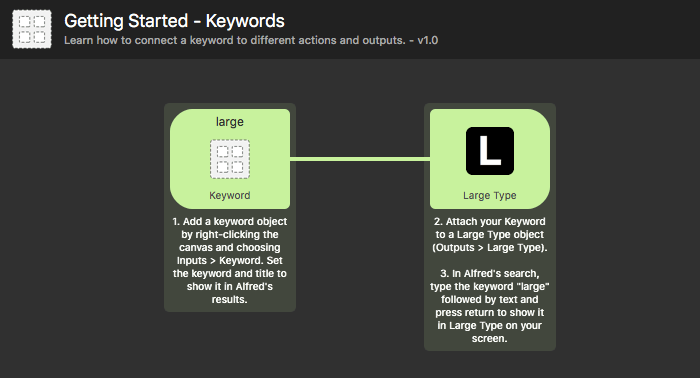
Right-click any object in your workflow and choose "Edit note..." to add a note attached to that particular object.
To see how useful notes are, take a look at any of our Getting Started workflows; Click the [+] in the bottom left of workflows and choose a Getting Started workflow. Put the notes to good use to help explain your workflow wherever needed!

Making Your Workflow Totally Shareable
When creating a workflow for your own use, you can use absolute paths, but when sharing, be sure to use relative paths.
If there are any pre-requisites, such as third-party apps, service subscriptions, API keys or language packages, make this clear. This ensures that users don't find themselves typing a keyword and waiting for something to happen when they don't have the right pre-requisites.
Does your workflow include a lot of images? Consider processing the images to make them as small as possible, using a service like TinyPNG. This ensures that the total size of your workflow stays efficient and small.
Sharing Your Workflow
When you've had a look at the tips above and you're ready to share your workflow, right-click the workflow in the sidebar and choose "Export..." to create a .alfredworkflow file, which you can share with fellow Powerpack users.
We'd love to see what you created so pop your workflow on GitHub or your own website, and share it on Alfred forum in the Share your Workflows section.
Updating Your Workflows
When updating a workflow and sharing it, be sure to update the version number in the workflow configuration under the [x] symbol in the top right of your workflow window.

