Configuring your Workflow as a creator
New in Alfred 5
When users install a workflow, they'll first see a configuration window that tells them a little more about the workflow; Who created it, where you can find additional resources and - in some cases - what additional details they need to fill in to make the most of the workflow.
Are you installing a workflow you downloaded and need help setting it up? Take a look at our guide for configuring an installed workflow instead.
As a workflow creator, this is where you can communicate with users and show off what your workflow can do.
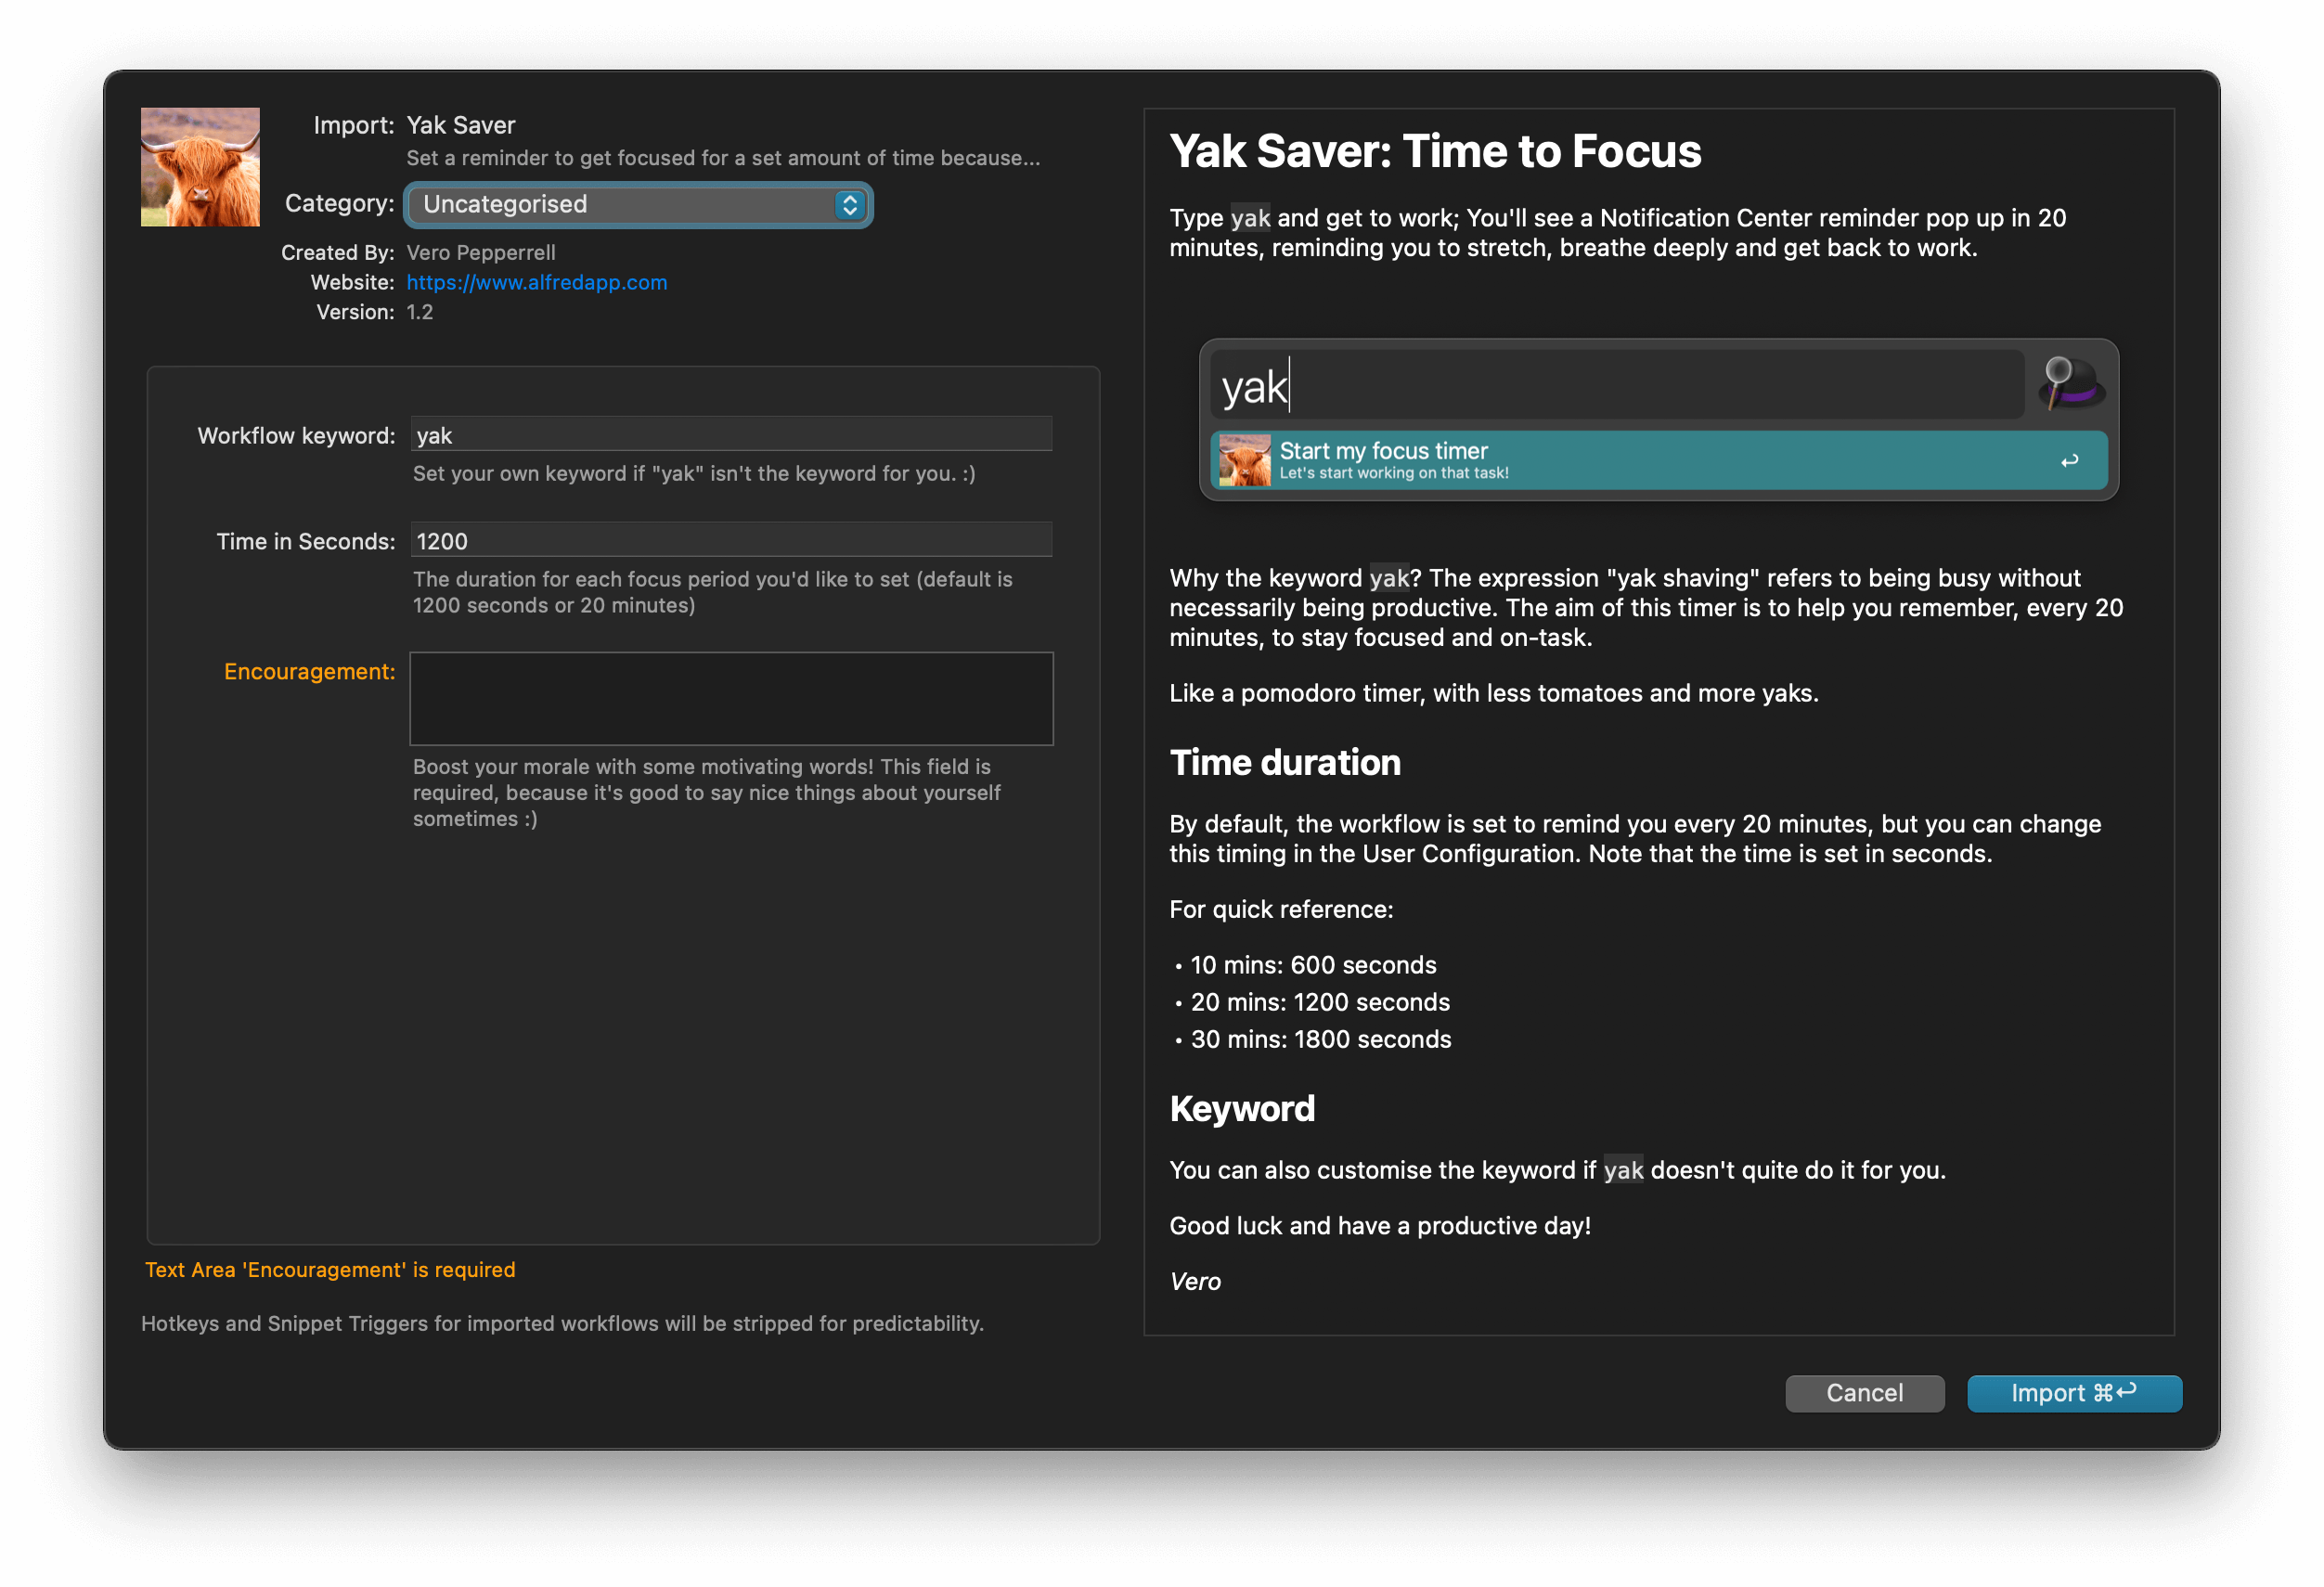
Want to take a look at the Yak Saver workflow as an example of Workflow Configuration? Install it from the Alfred Gallery to get started.
In the Workflow Editor, click the [x] symbol in the top right; You'll be able to edit three tabs:
1. Writing your Readme
When creating your readme, you can use Markdown syntax to make your content clearer.
2. Setting up Workflow Configuration
Workflow Configuration defaults are stored in
info.plist, but changed values are saved toprefs.plist. Add the latter to your.gitignoreso as to not commit your personal configuration to version control.
Use the "Configuration Builder" tab for any information you'd like the user to enter when they first set up the workflow. This might be a path on their Mac, an API key to a web service or a custom keyword.
Use the [+] in the bottom right of the Configuration Builder window to add your own fields.
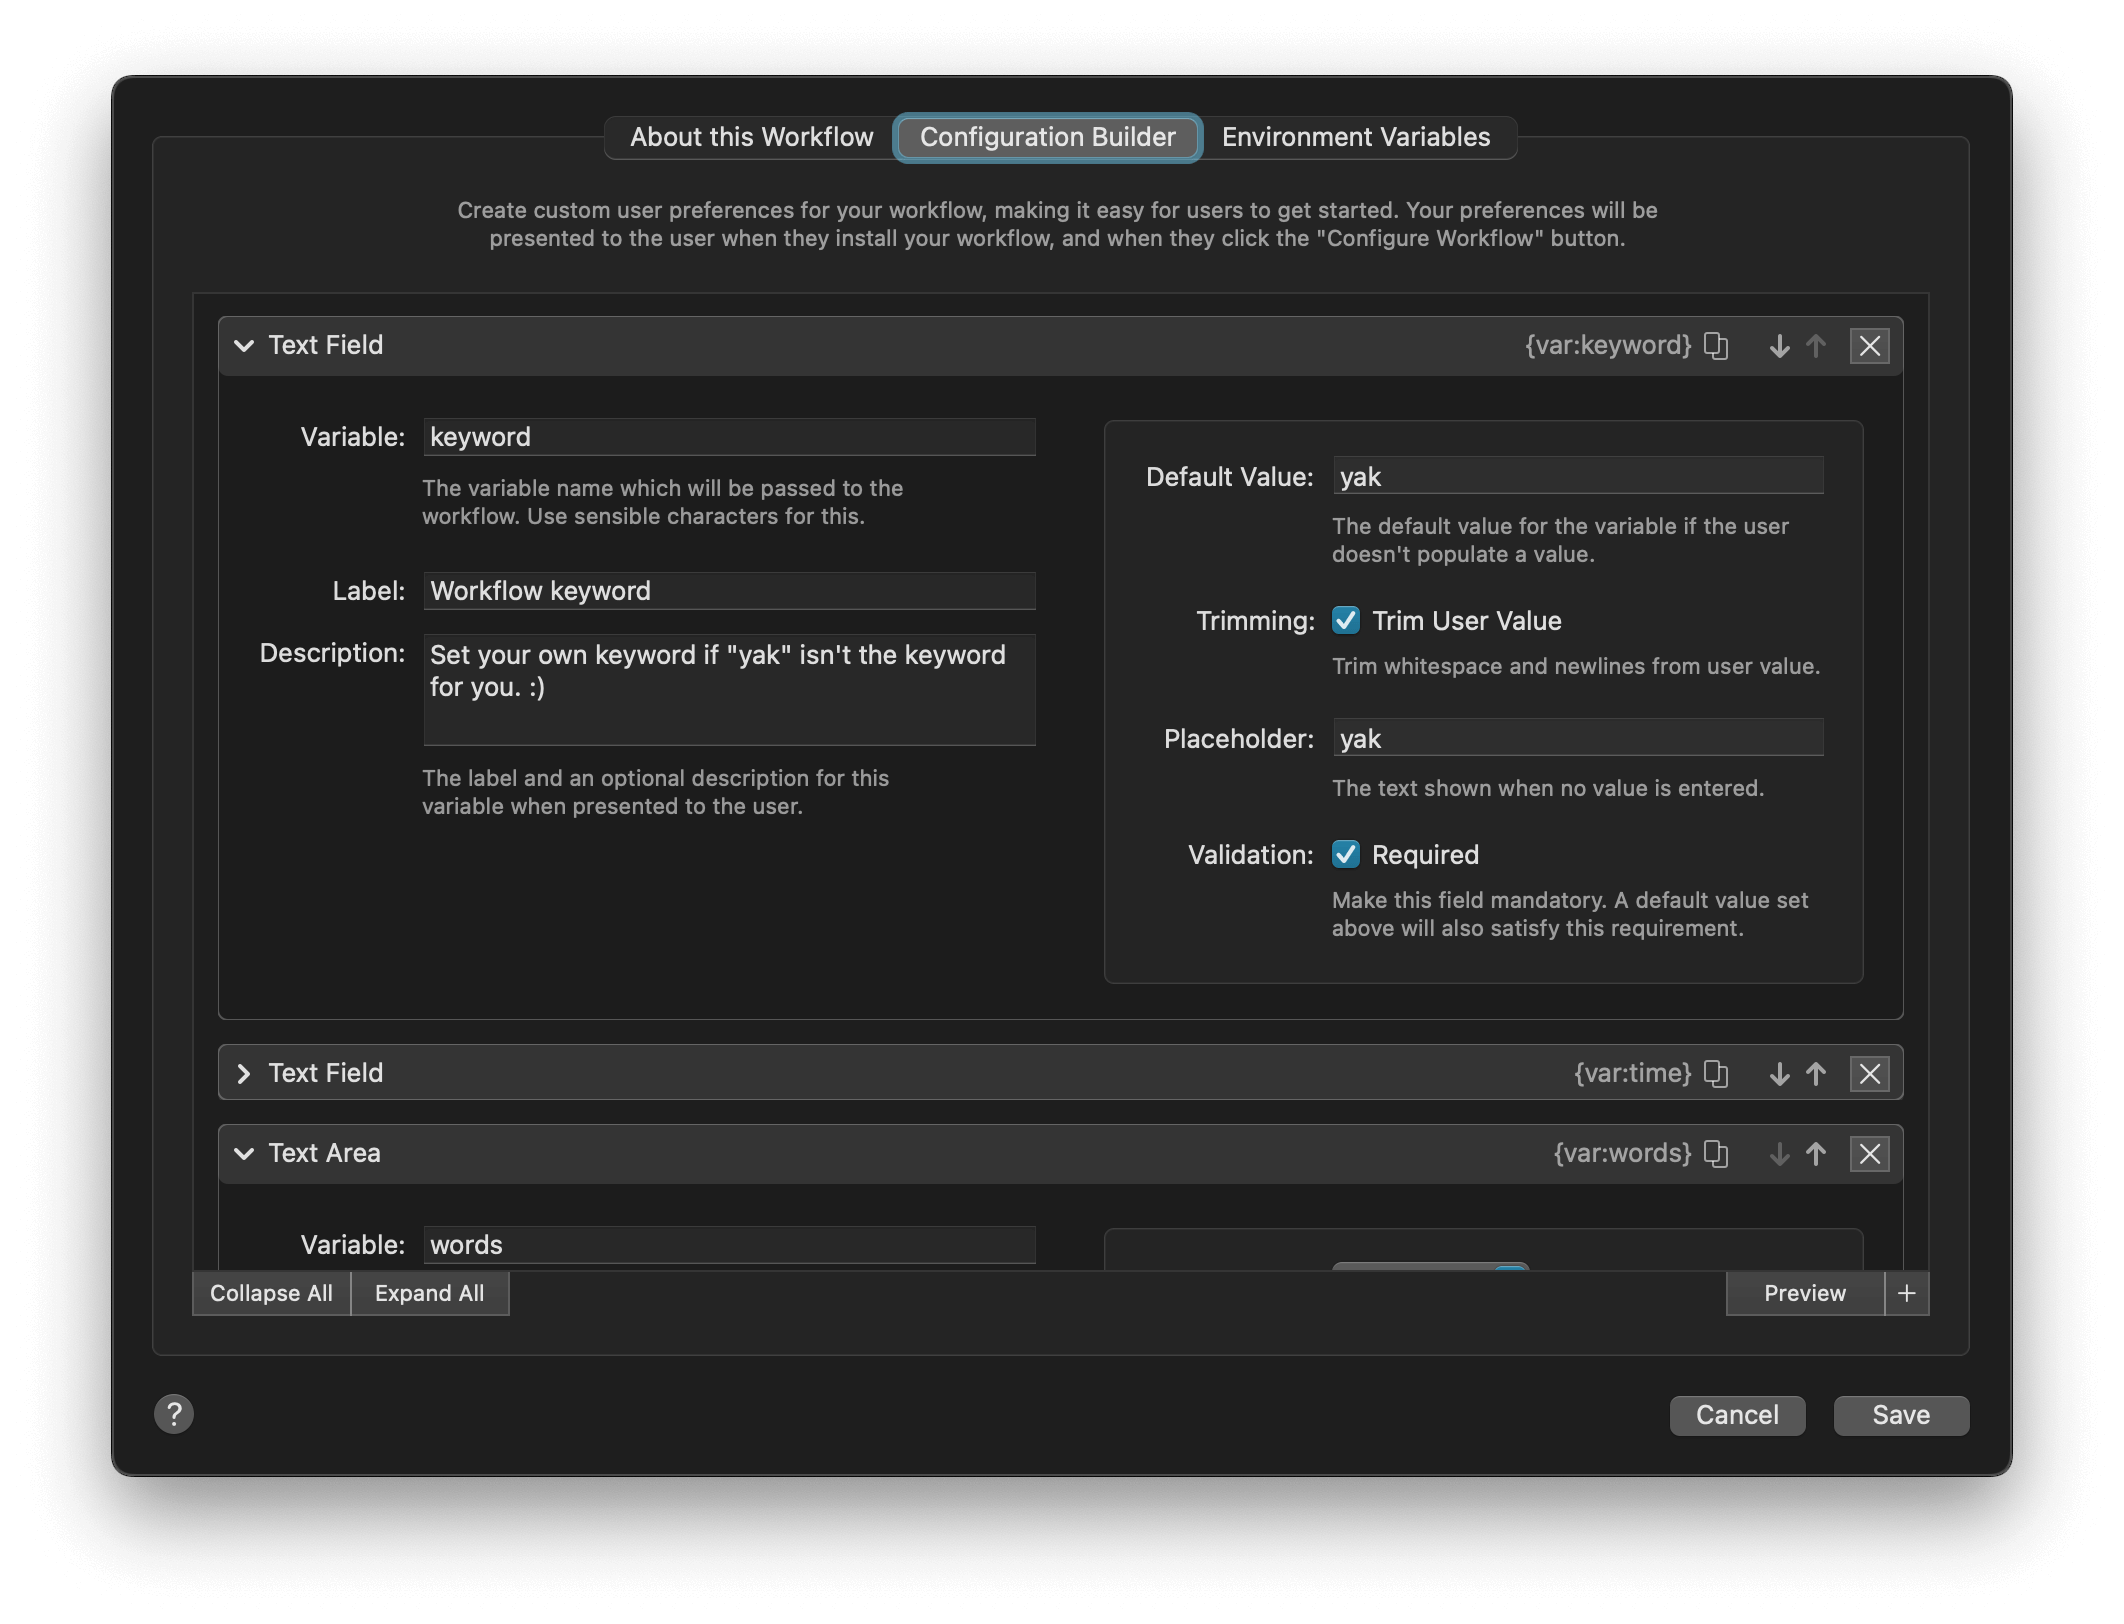
Use variables such as {var:keyword} in an object's Keyword field to make them user-customisable.
Make use of titles and descriptions to create a tidy layout, ensuring users can easily understand what information is required. Setting default values and placeholders is also a great way to help users get started as quickly as possible.
To view the layout users will see, save your configuration and click the Configure Workflow… button below the workflow name at the top of the canvas.
Because environment variables are always strings, values you configure should be self-explanatory. A couple might not be immediately obvious:
- The
Checkboxconfiguration returns either0(unchecked) or1(checked). The Conditional Utility hasis trueandis falsepopover options which take this into consideration. - The
File Pickerconfiguration previews the home folder as~, but the Workflow sees the real/Users/[username]path. Take advantage of this in theDefault Valuefield: using~ensures the path is correctly expanded for your users.
3. Environment Variables
You can read more about setting Environment Variables on the advanced Variables documentation.
4.Sharing your workflow
Once you've created your workflow and filled in the readme and any necessary configuration, be sure to share it with the community!
We've created a guide to sharing your workflow on GitHub, which is a great way to make your workflow accessible to fellow Alfred users.
Need help?
If you'd like help with creating or configuring workflows, pop by the Alfred Forum where we'll be happy to help you!