Creating an Alfred Workflow Without a Single Line of Code
Note: This post relates to Alfred 2. There will be subtle differences in newer versions of Alfred, so take a look at the up-to-date tutorial on creating a File Filter workflow if you're using the latest version of Alfred.
When we designed the Workflows feature in Alfred v2, our objective was to give users who are not programmers the freedom to create their own workflows. This meant creating a platform that would allow you to drag and drop objects, connect them together and tell Alfred what to do or search without writing a single line of code.
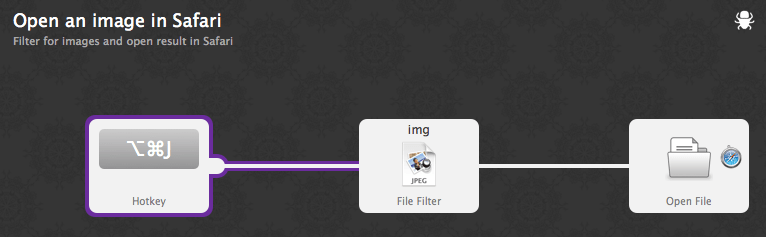
Today's tutorial will walk you through creating a very simple workflow using Objects - without a single line of code. We'll create a search for images which then opens your chosen result in Safari. We'll then wire a hotkey so that you can bring up the search with a custom hotkey.
Why should you use Workflows?
I alluded to this in the previous tutorial about importing and setting up workflows created by other users; Alfred's core set of features are intended to suit the more general needs of users with features like the Clipboard History, Theming, iTunes Mini Player, etc.
However, in YOUR work day, there are tasks you repeat frequently that you might want to do more efficiently and quickly. This is where workflows are useful; you can create quick ways to trigger actions.
Without a single line of code, you could:
- Launch your "morning links": Launch all of your important daily websites with a single hotkey or keyword.
- Set hotkeys for applications: Rather than type the name of the apps you frequently need into Alfred, set a hotkey to launch it instantly.
- Filter your search: Remove clutter by filtering your search to only PDF files in your "Work" folder with a keyword
- Give nicknames to applications: Add the nickname "browser" to Safari, Chrome and Firefox to bring them all up in a search.
- These are just a few examples, you can do so much more!
Let's start simply with our image search workflow.
Creating your Workflow
There are two ways to start creating a workflow; You can either use an existing example or template, or you can start with a blank slate and pick your own workflow objects. The examples are a great way to see what can be done with a workflow.
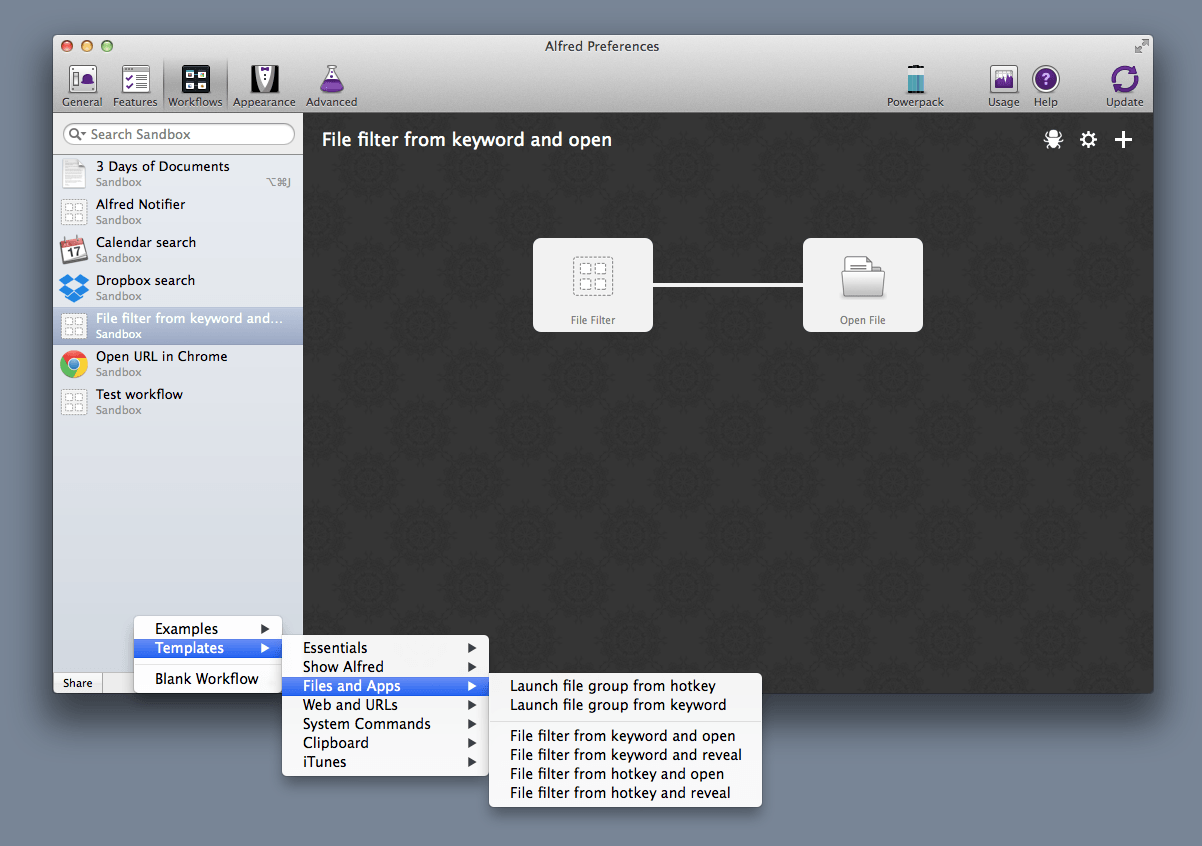
To choose a template, click the + button at the bottom of the workflow sidebar and pick the most suitable template for your needs. You'll then be able to modify it or connect additional objects to it to do exactly what you want it to do.
To create a new workflow from scratch, select "Blank Workflow" instead.
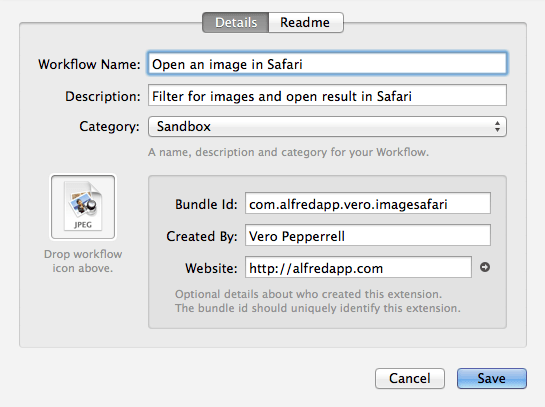
Give your workflow a name, description and include your own identifier details. You can also drop an image into the image well on the left to give your workflow an icon.
Adding Objects to your Workflow
If you've started with a blank workflow, you'll need to add your first object. For our "Open an image in Safari" workflow, the first object we need is a "File Filter" input. Click the + button in the top right of your workflow and choose Inputs > File Filter.
In my File Filter object settings, I've filled in some details and dragged in the four image types I want to include into my search results; jpg, gif, png and tiff files.
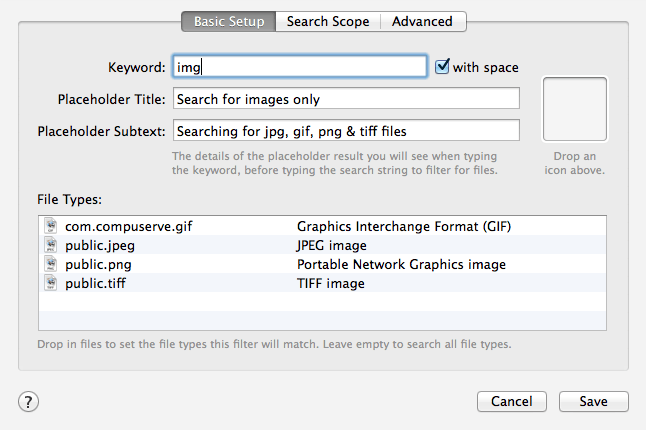
If you want to search a particular folder, you can use the second tab to narrow down the search scope, but in this instance, we'll keep the default search scope.
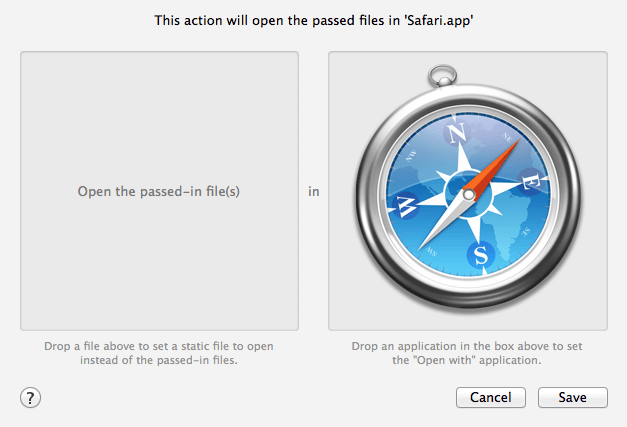
The second object is the "Open File" action. Search for Safari using Alfred, and drag Safari from Alfred's results into the second box of "Open File" to specify which application the images found should open in.
Finally, let's add our third object; the Hotkey Trigger. Set a hotkey of your choice.

Connecting Objects Together
The only remaining step is to connect our objects together.
Hover over the first object to see the handle appearing on the right edge. Drag a connecting line from it to the left handle of the second object. Do the same connecting the second object to the third.
And that's it, you've created your first workflow!
Type "img" into Alfred, followed by the name of an image file you want to search for, then hit return to open the image in Safari. Alternatively, use the hotkey you've just set to bring up the workflow.
![]()
Exporting and sharing your workflow
Once you've finished creating your masterpiece, you can export it to share it. Right-click the workflow in the sidebar and choose "Export..." to create a .alfredworkflow file you can share with fellow Powerpack users.
You can download the "Open an image in Safari" workflow created for this tutorial.
We'll be publishing many more tutorials over the coming months, so follow us on Twitter to find out when we next publish them.