What's the solution when the app you want to launch is Photos, but you keep calling it "iPhoto" - out of habit or nostalgia for the old days - or when you frequently misspell an app's name?
You let Alfred do the legwork of launching the right app or file for you by creating the simplest workflow ever!
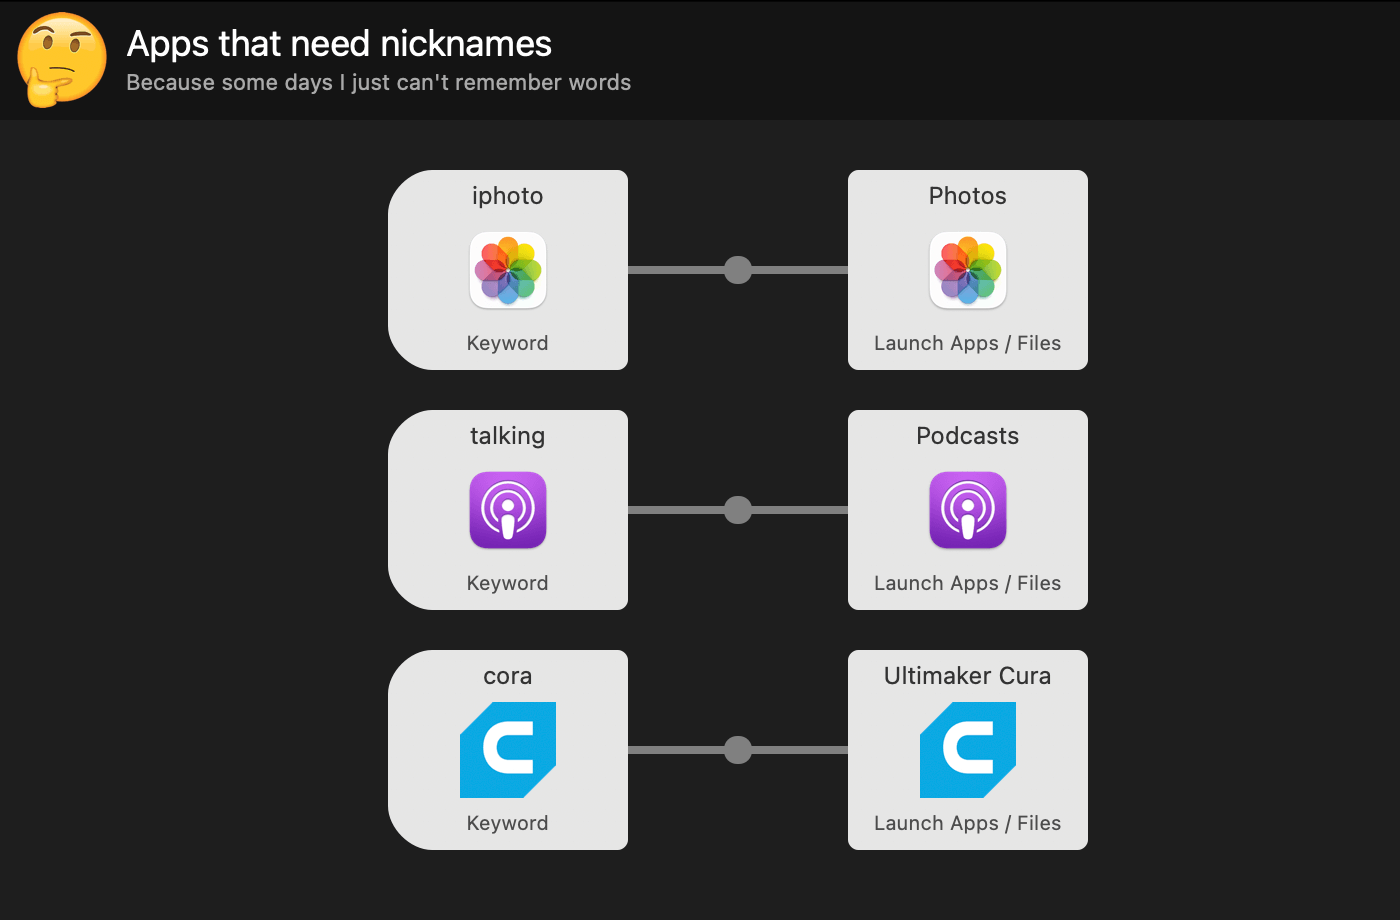
Create a simple workflow using Templates > Files and Apps > "Launch file group from keyword", or create your own blank workflow. Connect a Keyword Input to a Launch Apps/Files Action and fill in the details.
You can add multiple object pairs to this particular workflow, connecting each app you want to launch to its respective alternative keyword.
If you've made a habit of using Alfred's Clipboard History Viewer regularly to look for previously used items you've copied, here's a tip for you: You can save a clipped item as a snippet!
Pop up the Clipboard Viewer by using ⌘⌥C (or the alternative key combo you've set), choose the item you want and use ⌘S to save the clipped item as a snippet.
The Snippets preferences will open with your snippet content pre-filled, so you only have to add a name and, optionally, a keyword if you want to auto-expand your snippet.
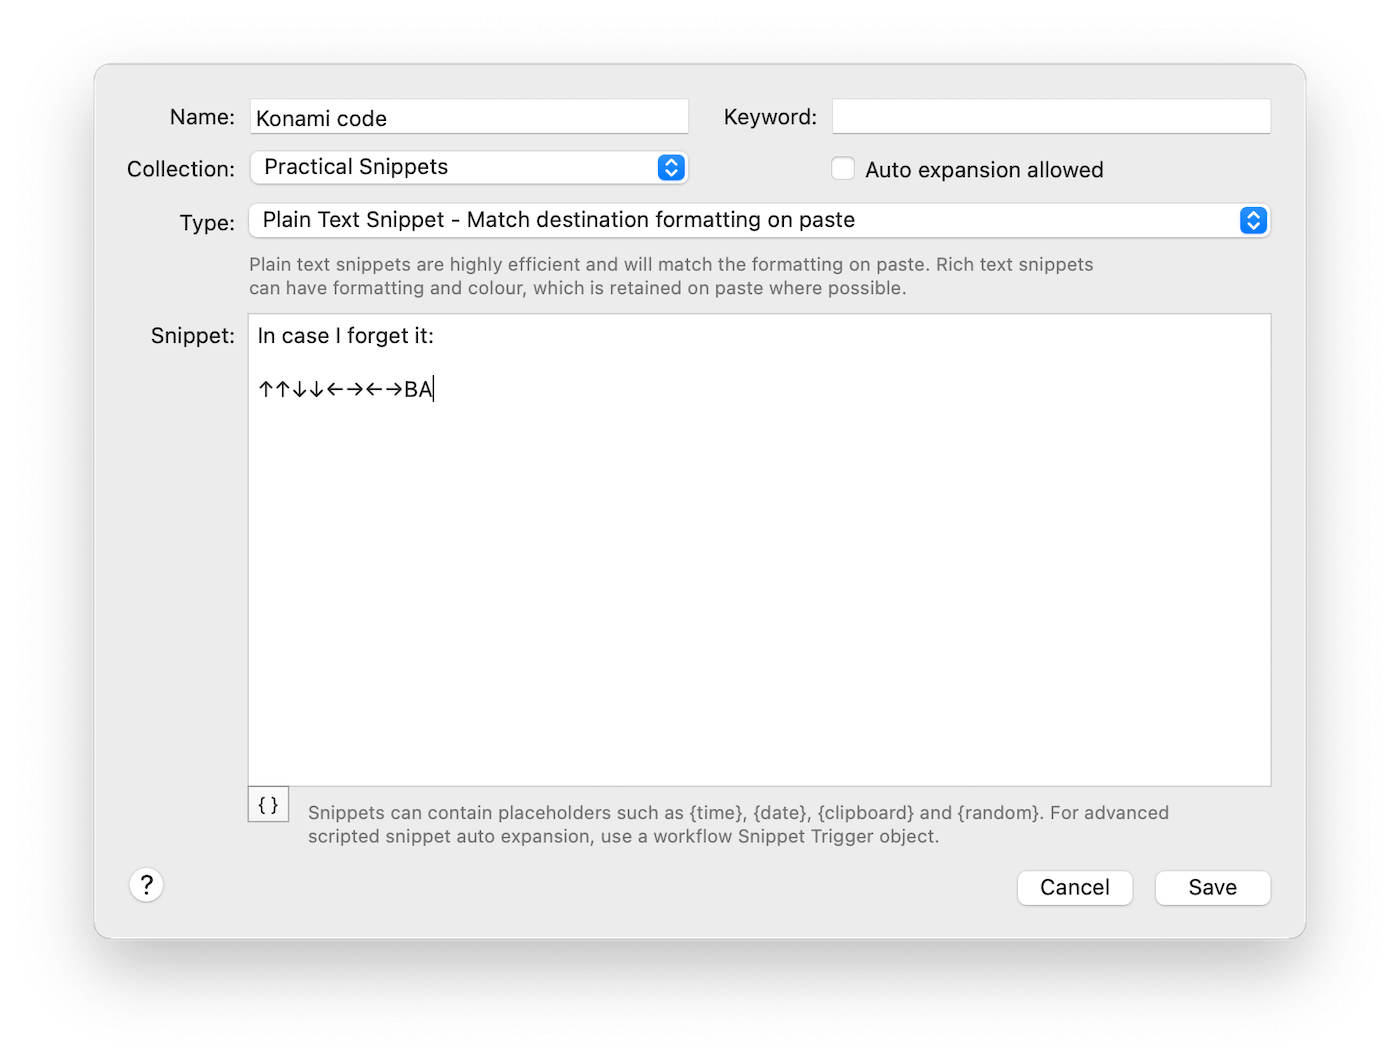
If you don't set a snippet keyword to auto-expand, the snippet will still be easily accessible either through the Clipboard/Snippet Viewer, or the "snip" keyword.
Last week, we released Alfred 4.3.1, which contains improvements to theming, workflows as well as general refinements.
If you're using macOS 11 Big Sur, we recommend updating to 4.3.1, as this release further refines support for Big Sur.
You can grab the latest release in Alfred 4's Update tab, or by downloading it from alfredapp.com. Curious to see everything that's been added? Take a look at the change log for the full list.
On Monday, we released Alfred 4.3, which you can download from alfredapp.com or via in-app update.
It's a lovely big release, with a key feature you can feast your eyes on. We've added new default themes - Alfred Modern and Alfred Modern Dark - to take advantage of the new theming improvements and to tie in with the new look of macOS Big Sur 11.
If you enjoy designing your own themes, you'll have fun creating new ones and taking advantage of the macOS Visual Effect view for a dark or light background, new rounded corners and much more. We'll be sharing a more detailed post on using these new theming features soon.
In the meantime, take a look at the Change Log for a more detailed list of changes to theming, as well as a long list of improvements and tweaks to other existing features.
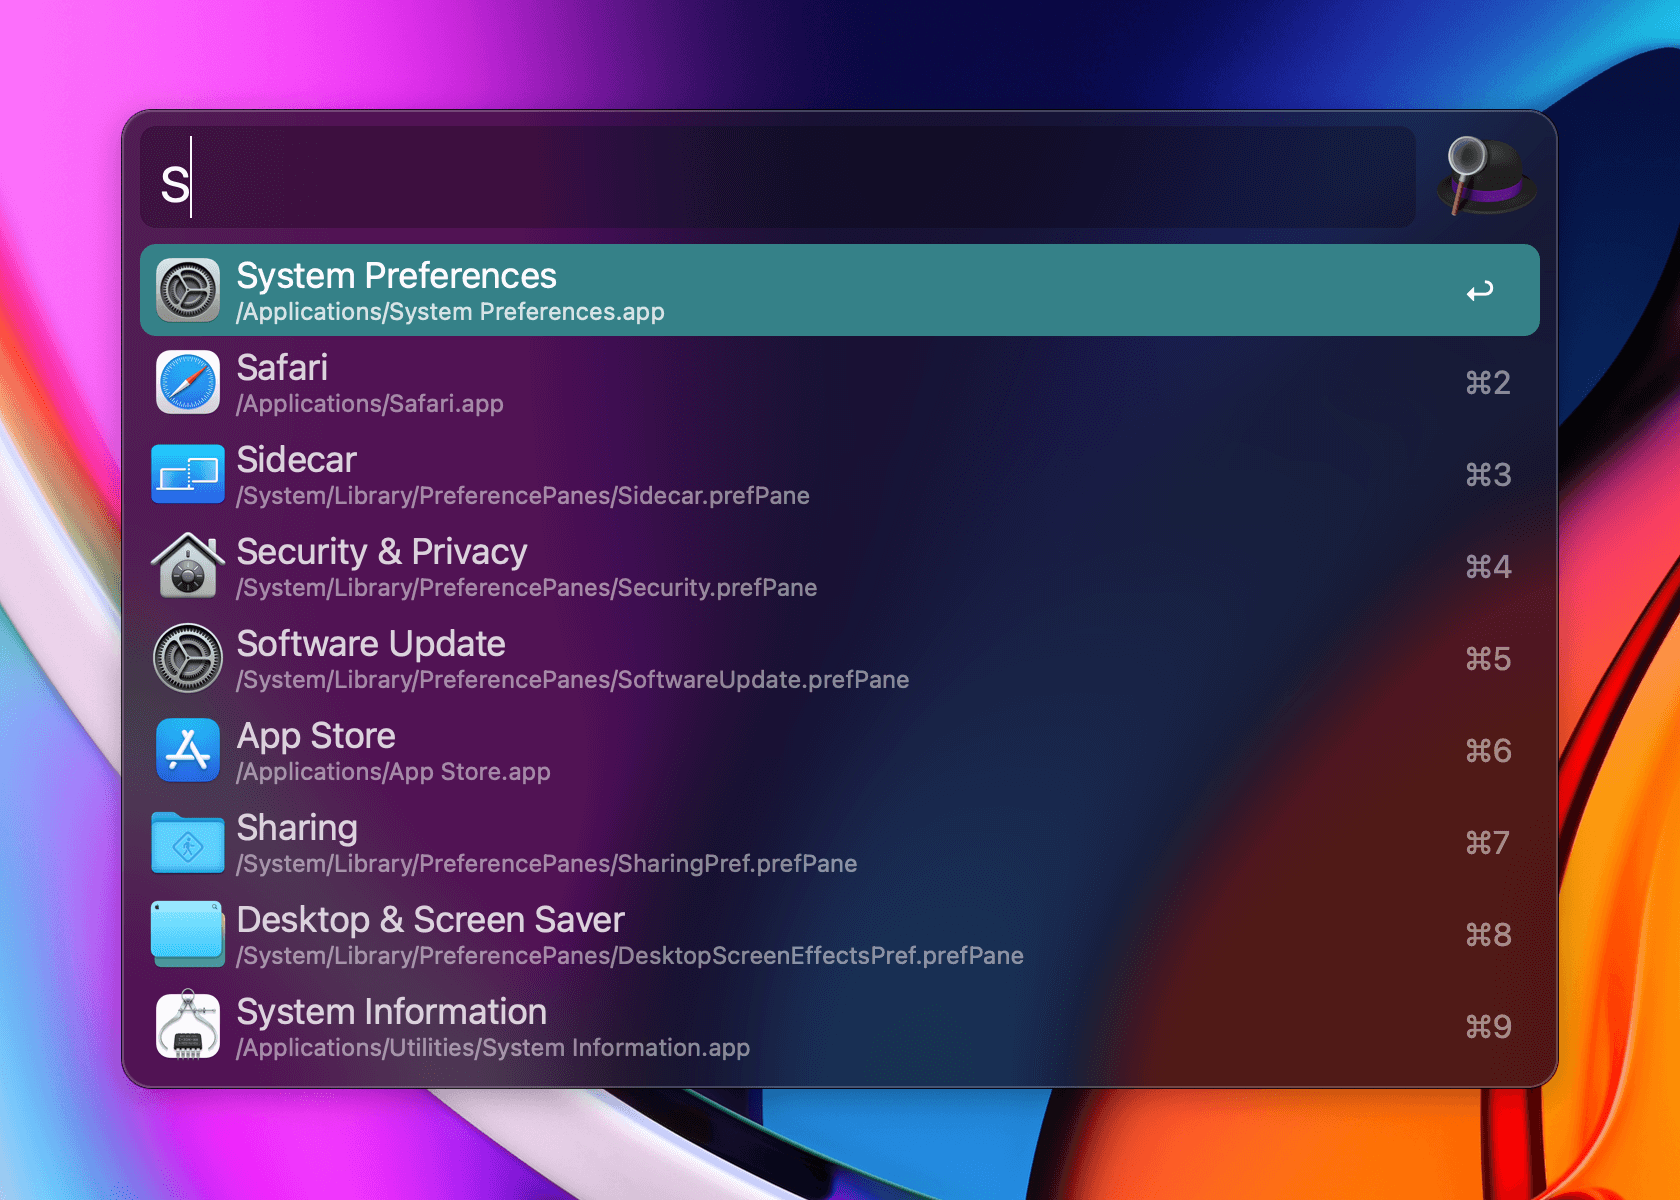
Did you know that Alfred can keep your query history?
This handy feature makes it easy to quickly look through your recent queries to pick up where you left off. Just press the up arrow in Alfred's main view to see up to 20 of your latest queries.
You can also choose to show the latest one if you pop up Alfred within 5 minutes of your last query, once you've enabled it in Alfred's Advanced preferences under "Show latest query if within 5 minutes".

From Alfred 4.3 onwards, you can also use ⌃ ↑ and ⌃ ↓ to navigate through your recent query history at any time.