With every release, our focus is to make your everyday Alfred experience as enjoyable as possible. Alfred v2.5 contains both visible improvements and subtle tweaks; You'll find the highlights in the notes below, with more details in the change log. Ready? You can now grab the Alfred v2.5 update either through in-app update or from our website right away.
Alfred is now fully Yosemite-ready
Over the past few months, we've been keeping a close eye on the OS X 10.10 previews. Since the new Yosemite themes we've added in v2.4, we've been putting Alfred through his paces to ensure that he runs smoothly on Yosemite. As such, you can feel confident you'll be able to use Alfred right away when upgrading to Yosemite once Apple officially releases it.
Web searches (and more) are now https
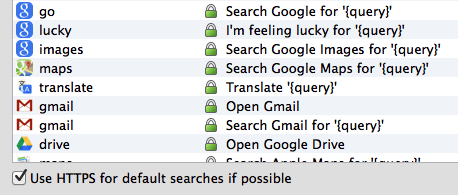
If you take a look at Alfred's web searches, you'll notice that many of them are now accompanied by a green padlock. These web searches are now available as https by default, providing you with more secure searches.
We've also switched our auto-updates to be checked and downloaded over https through our CacheFly CDN (content delivery network).
Additionally, it's now much easier to add your own custom web searches, as Alfred will handle encoding special URL characters when necessary.
Workflow improvements
Workflows are at the heart of Alfred, so we are continuously refining this extensive, highly-customisable feature. You'll find a whole heap of improvements in the change log. A few of the highlights are:
- Performance enhancements: Numerous improvements, including change workflow input filter behaviour to prevent unnecessary script execution
- Improve workflow behaviour when running your workflows directly (e.g. from a hotkey)
- Title (for keyword input) and Placeholder Title (for script / file filter inputs) are now required workflow input fields to prevent confusion from blank results
- New icons for iTunes commands
- Updated workflow resource icons and examples to 256px for future-proofing (e.g. Alfred Remote)
You'll find many more improvements and bug fixes in the change log. We're already planning further improvements you'll love, so keep an eye on our Twitter updates for lots of good stuff and sneak previews of Alfred Remote soon!
Workflows are a great way to extend Alfred in ways that fit your particular needs and the frequent tasks in your personal routine. In this post, I've gathered a few valuable tips on organising and managing your growing collection of workflows.
Sync your workflows

If you have a Mac at home and that you're lucky to have an enlightened boss, you might have a Mac at the office too. If you use Alfred on both, you can sync your Alfred settings - including your workflows - between your two Macs using Dropbox. Create a new workflow at work (or a theme, custom search or snippet) and it'll be automatically synchronised with your Mac at home.
Jump to the Advanced tab in Alfred's preferences to set synching up, or take a look at the tutorial on syncing using Dropbox for a walkthrough on syncing your settings.
Categorise and filter your workflows
As your collection of workflows grows, you can organise them into categories. There are a few default categories to get you started, but you can add your own so that you can quickly locate all your music-related workflows, for example.
Once you've assigned your workflows to categories, you can filter to show a single category by clicking on the magnifying glass at the top of your list of workflows.
Find out more about creating workflow categories and filtering on our support site.
Show which hotkeys are in use
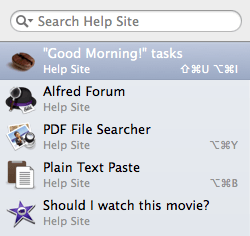 If you're a hotkey fiend but your memory sometimes fails you, you can see at a glance all of your workflow hotkeys in the workflows list. You can toggle this view by clicking on the magnifying glass and checking the "Show hotkeys" box under Display Options.
As well as showing the hotkeys, there are other Display Options; Show categories, show workflow creator's name and only show enabled workflows.
Group actions into a single workflow
A handy way of keeping track of similar actions, such as hotkeys used to launch applications, is to add them to a single workflow instead of creating a new workflow for individual hotkeys.
For example, below is the workflow I use for launching applications like browsers and tools I need frequently. To add these hotkeys, you simply need a "Hotkey" trigger connected to a "Launch Apps / Files" action.
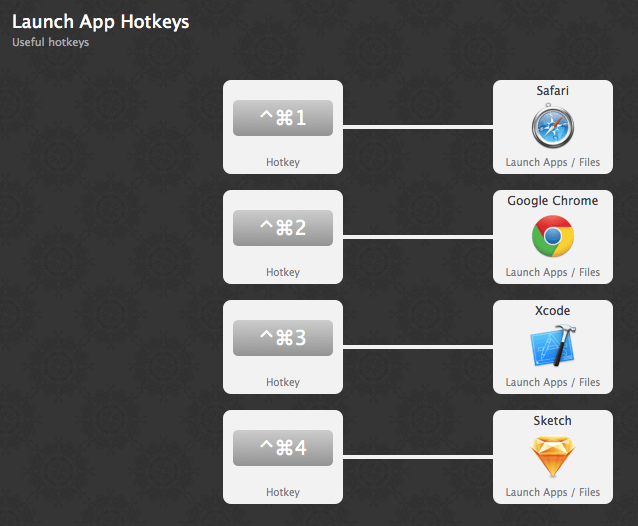
You could do the same for a collection of file filter workflows or any other actions you've grouped together, making it quicker and easier to locate them.
Look out for workflows created by other users
As well as creating your own workflows, it's worth taking a look at the wonderful range of workflows created by fellow Alfred users.
You'll find some here on the blog, on the Alfred forum and on the wonderful Packal (created and maintained by Shawn Rice). Many developers host their workflows on their own websites so it's also worth a quick Google search and a look at Github. It's likely that if you've thought about it, someone has created a workflow for it! :)
Today's tutorial takes a look at how you can create a workflow using the same keyword for multiple actions.
Generally, it's preferable to have unique keywords, so that you can type it, hit the Return key and launch the workflow. However, when you have a set of similar actions to perform that you don't use everyday, it can be a useful way to group them together. Remembering numerous rarely-used keywords can be inconvenient when you have a memory like a sieve!
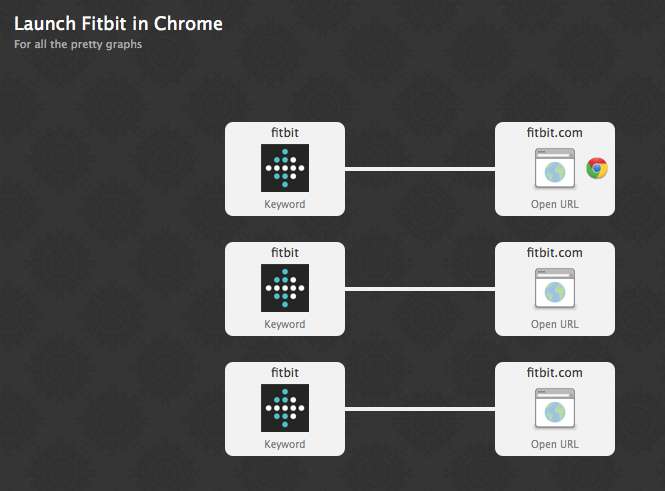
For example, I use Safari as default browser, but need to view sites that requires Flash in Chrome, so I first set up a workflow that launches the Fitbit website in Chrome. I then added two more actions to launch different pages to log activities and sleep when I've forgotten to wear my wristband. (What did I say about being forgetful?)
As you can see, the keyword brings up four items; Three workflow entries and the Fitbit Connect app. The most frequently used result (the website) appears at the top of the list, but the other actions are also conveniently available for occasional use.
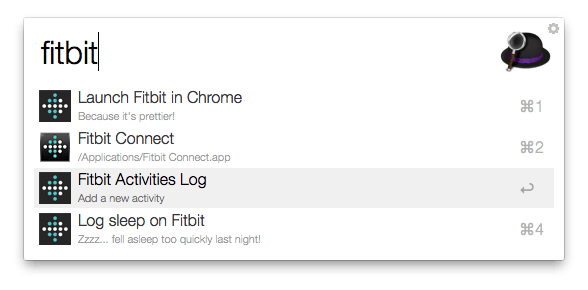
To set up this workflow, I simply connected each action to a separate, but identical keyword. If I had connected the three "Open URL" objects to a single keyword, Alfred would have presented me with a single results, and all three pages would have launched at the same time when I hit Return (which can also be useful, but wasn't the objective here).
In this case, all keywords except for the Fitbit Connect application are part of the workflow, but you could also use the keyword for a custom search if the website had a searchable documentation section.
Enjoyed this short tutorial? You'll find many more in the Tutorials section of the blog.
Alfred v2.4 officially brings in OS X Yosemite compatibility and theming improvements, as well as some general improvements and bug fixes.
While Alfred has been working fine on Yosemite since the first OS X 10.10 beta, this latest release adds improvements and fixes the minor quirks some users have experienced in Yosemite.
Theming Improvements
We've made loads of theming improvements and have added two gorgeous Yosemite-style themes to the default selection of themes, with a light and a dark version using Helvetica Neue Light for a swish fresh look.
If you're a Powerpack user, you can customise the themes to get a slick semi-transparent background by turning down the opacity of the background and setting the new window blur option to medium in the Appearance Options.
Amongst the many other theming improvements, you can also now change when to show the result subtext, allowing you better control over how minimalist your theme is; Show the result subtext for the selected row or only for alternative actions.
Fuzzy Matching for File System Navigation
This new option makes browsing the file system even easier by introducing fuzzy matching; While browsing your file system navigation results, "CS" will bring up ColorSnapper or "GC" for Google Chrome. This setting is on by default and matches file results more loosely for a more natural search.
If you preferred the old bash/shell style navigation, you can turn off fuzzy matching in Alfred's Features > File Search > Navigation preferences.
Improvements to Workflows
Amongst the many workflow improvements, you'll find some useful new alfred_ environment variables when running scripts, which provide commonly required Alfred information. We've included more details on these variables in this support Knowledge Base.
We've also added support for proxies (http_proxy and https_proxy) and the proxy exception list. You can enable proxy support in Alfred's Advanced preferences.
Many more improvements and bug fixes
Have a look at the change log for the full list of improvements and fixes. And don't forget to update to v2.4 in-app through the Update tab or download it from our website.
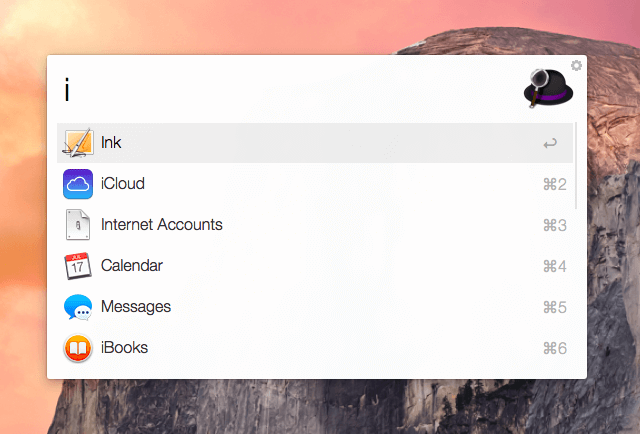
There's something almost magical about Alfred learning to predict the result you want most when you type a few characters; It's the perfect and easy way to search for apps, folders, contacts and other results that live on your Mac.
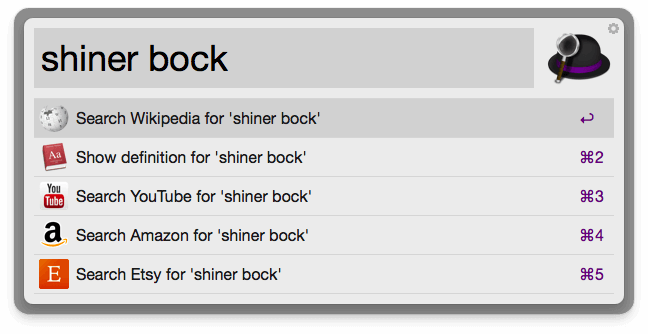
However, sometimes, you need to do a quick web search. The usual way to do this would be to type "wiki" followed by your search term to launch the relevant Wikipedia page, or type "youtube" to search YouTube. But there IS an even quicker way to search your most-used sites: Fallback searches. They're the list of search options you see when you search for a keyword that doesn't match a result on your local Mac.
The default fallback searches are Google, Wikipedia and Amazon, as these are the most commonly used web searches. If you're a Powerpack user, you can customise these to your favourite sites or actions instead.
Here are my fallback searches; Wikipedia, the OS X dictionary, YouTube, Amazon and Etsy. (and yes, I'm searching for beer)
You can change your fallback searches in Alfred's preferences under Features > Default Results, where you'll see a "Fallback Results" button. Use the + button to add web searches, custom searches and workflow triggers. You can then drag and drop them to reorder them.
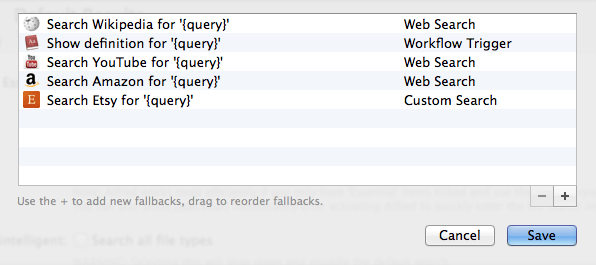
My fallbacks are a mix of default web searches (Wikipedia, YouTube and Amazon), custom searches (Etsy) and workflow triggers (Dictionary search).
Create custom searches for your favourite websites that aren't part of Alfred's default web searches, or create fallback triggers in workflows for actions like "Show definition for {query}".
Once you've arranged these in the order you want, your fallback searches will appear anytime you type a keyword where Alfred doesn't find a local search result! :)
Enjoyed this post? We've published more tips and tricks on making the most of Alfred.