Update: The new OpenAI ChatGPT / DALL-E workflow by the Alfred team is now the recommended way to interact with ChatGPT.
You can download the official ChatGPT / DALL-E workflow from Alfred Gallery.
Chatfred: A blog post by ChatGPT
Chatfred is an incredible Alfred workflow created by Chris Lemke that empowers Mac users to chat and generate images using state-of-the-art AI models like ChatGPT and DALL-E 2. To use Chatfred, users will need to sign up for an account with OpenAI and create an API key as this is essential to use the workflow. Don't worry, creating an account is easier than pronouncing "DALL-E"!

This workflow is a game-changer for anyone looking to enhance their productivity and creativity while using their Mac. With Chatfred, you can chat and generate images directly from Alfred without switching between apps or browsers. It's fast, easy, and convenient. The support for AI models like ChatGPT and DALL-E 2 makes Chatfred a standout workflow that can help you generate human-like responses and create stunning images with ease.
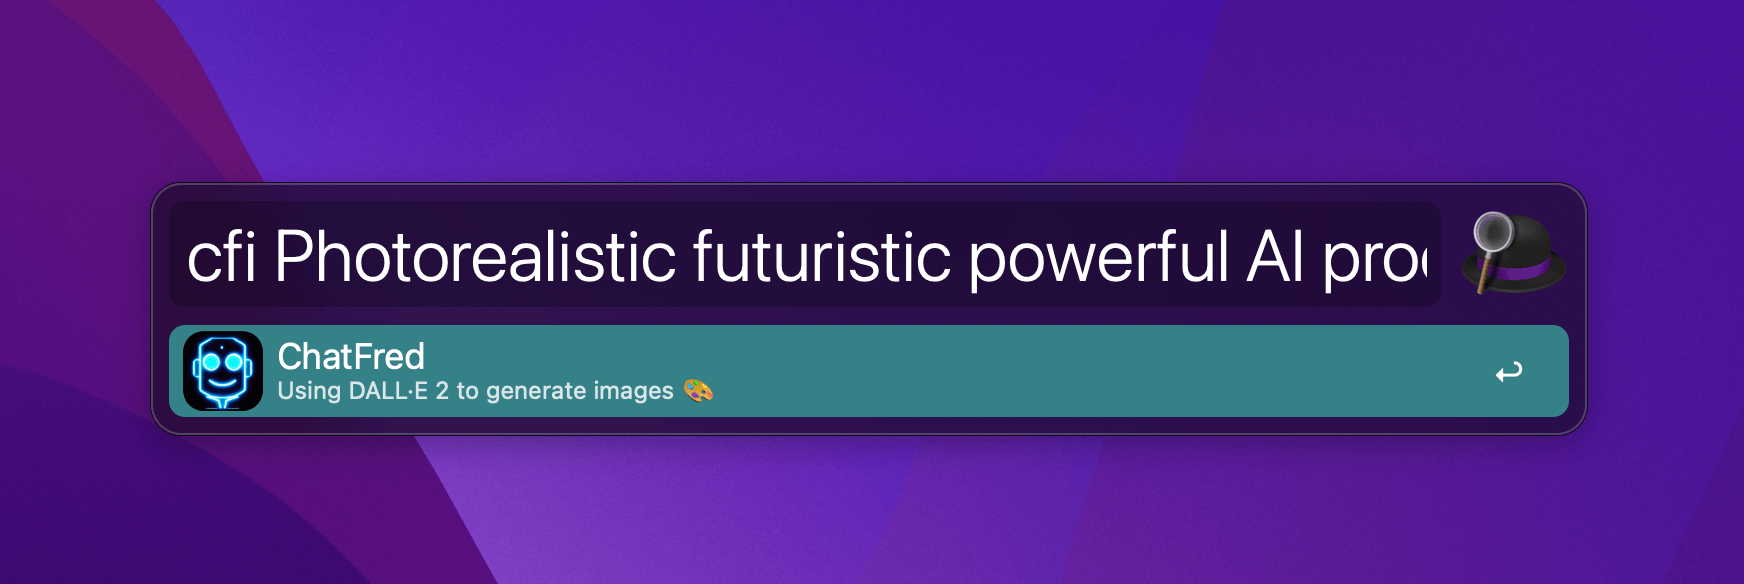
To use Chatfred, simply type the "cf" trigger keyword (or "cfi" for images) and the name of the model you want to use into Alfred's search bar. Then follow the prompts to generate your chat or image.
Chatfred is a must-have for anyone looking to streamline their workflow and take advantage of the latest AI technology. And hey, who knows, maybe you'll even be able to outsource some of your chatting to Chatfred so you can focus on other things... like telling more terrible jokes!
Download the Chatfred workflow on Alfred Gallery
Download the official ChatGPT / DALL-E workflow on Alfred Gallery
Note: While ChatGPT wrote the article, I added relevant links and formatting.
Image credit: Created using DALL-E 2 via the Chatfred workflow, using the query "Photorealistic futuristic powerful AI productivity machine in cityscape, with purple and turquoise colours".
Curious about creating your own workflows but not sure where to start? We've got you covered with the built-in Getting Started Guide to Workflows and the Alfred Gallery!
The Getting Started Guide
You'll find a built-in guide introducing you to workflows and how to configure them in the Alfred 5 Preferences.
We created this guide so that absolute beginners could find their way with ease.
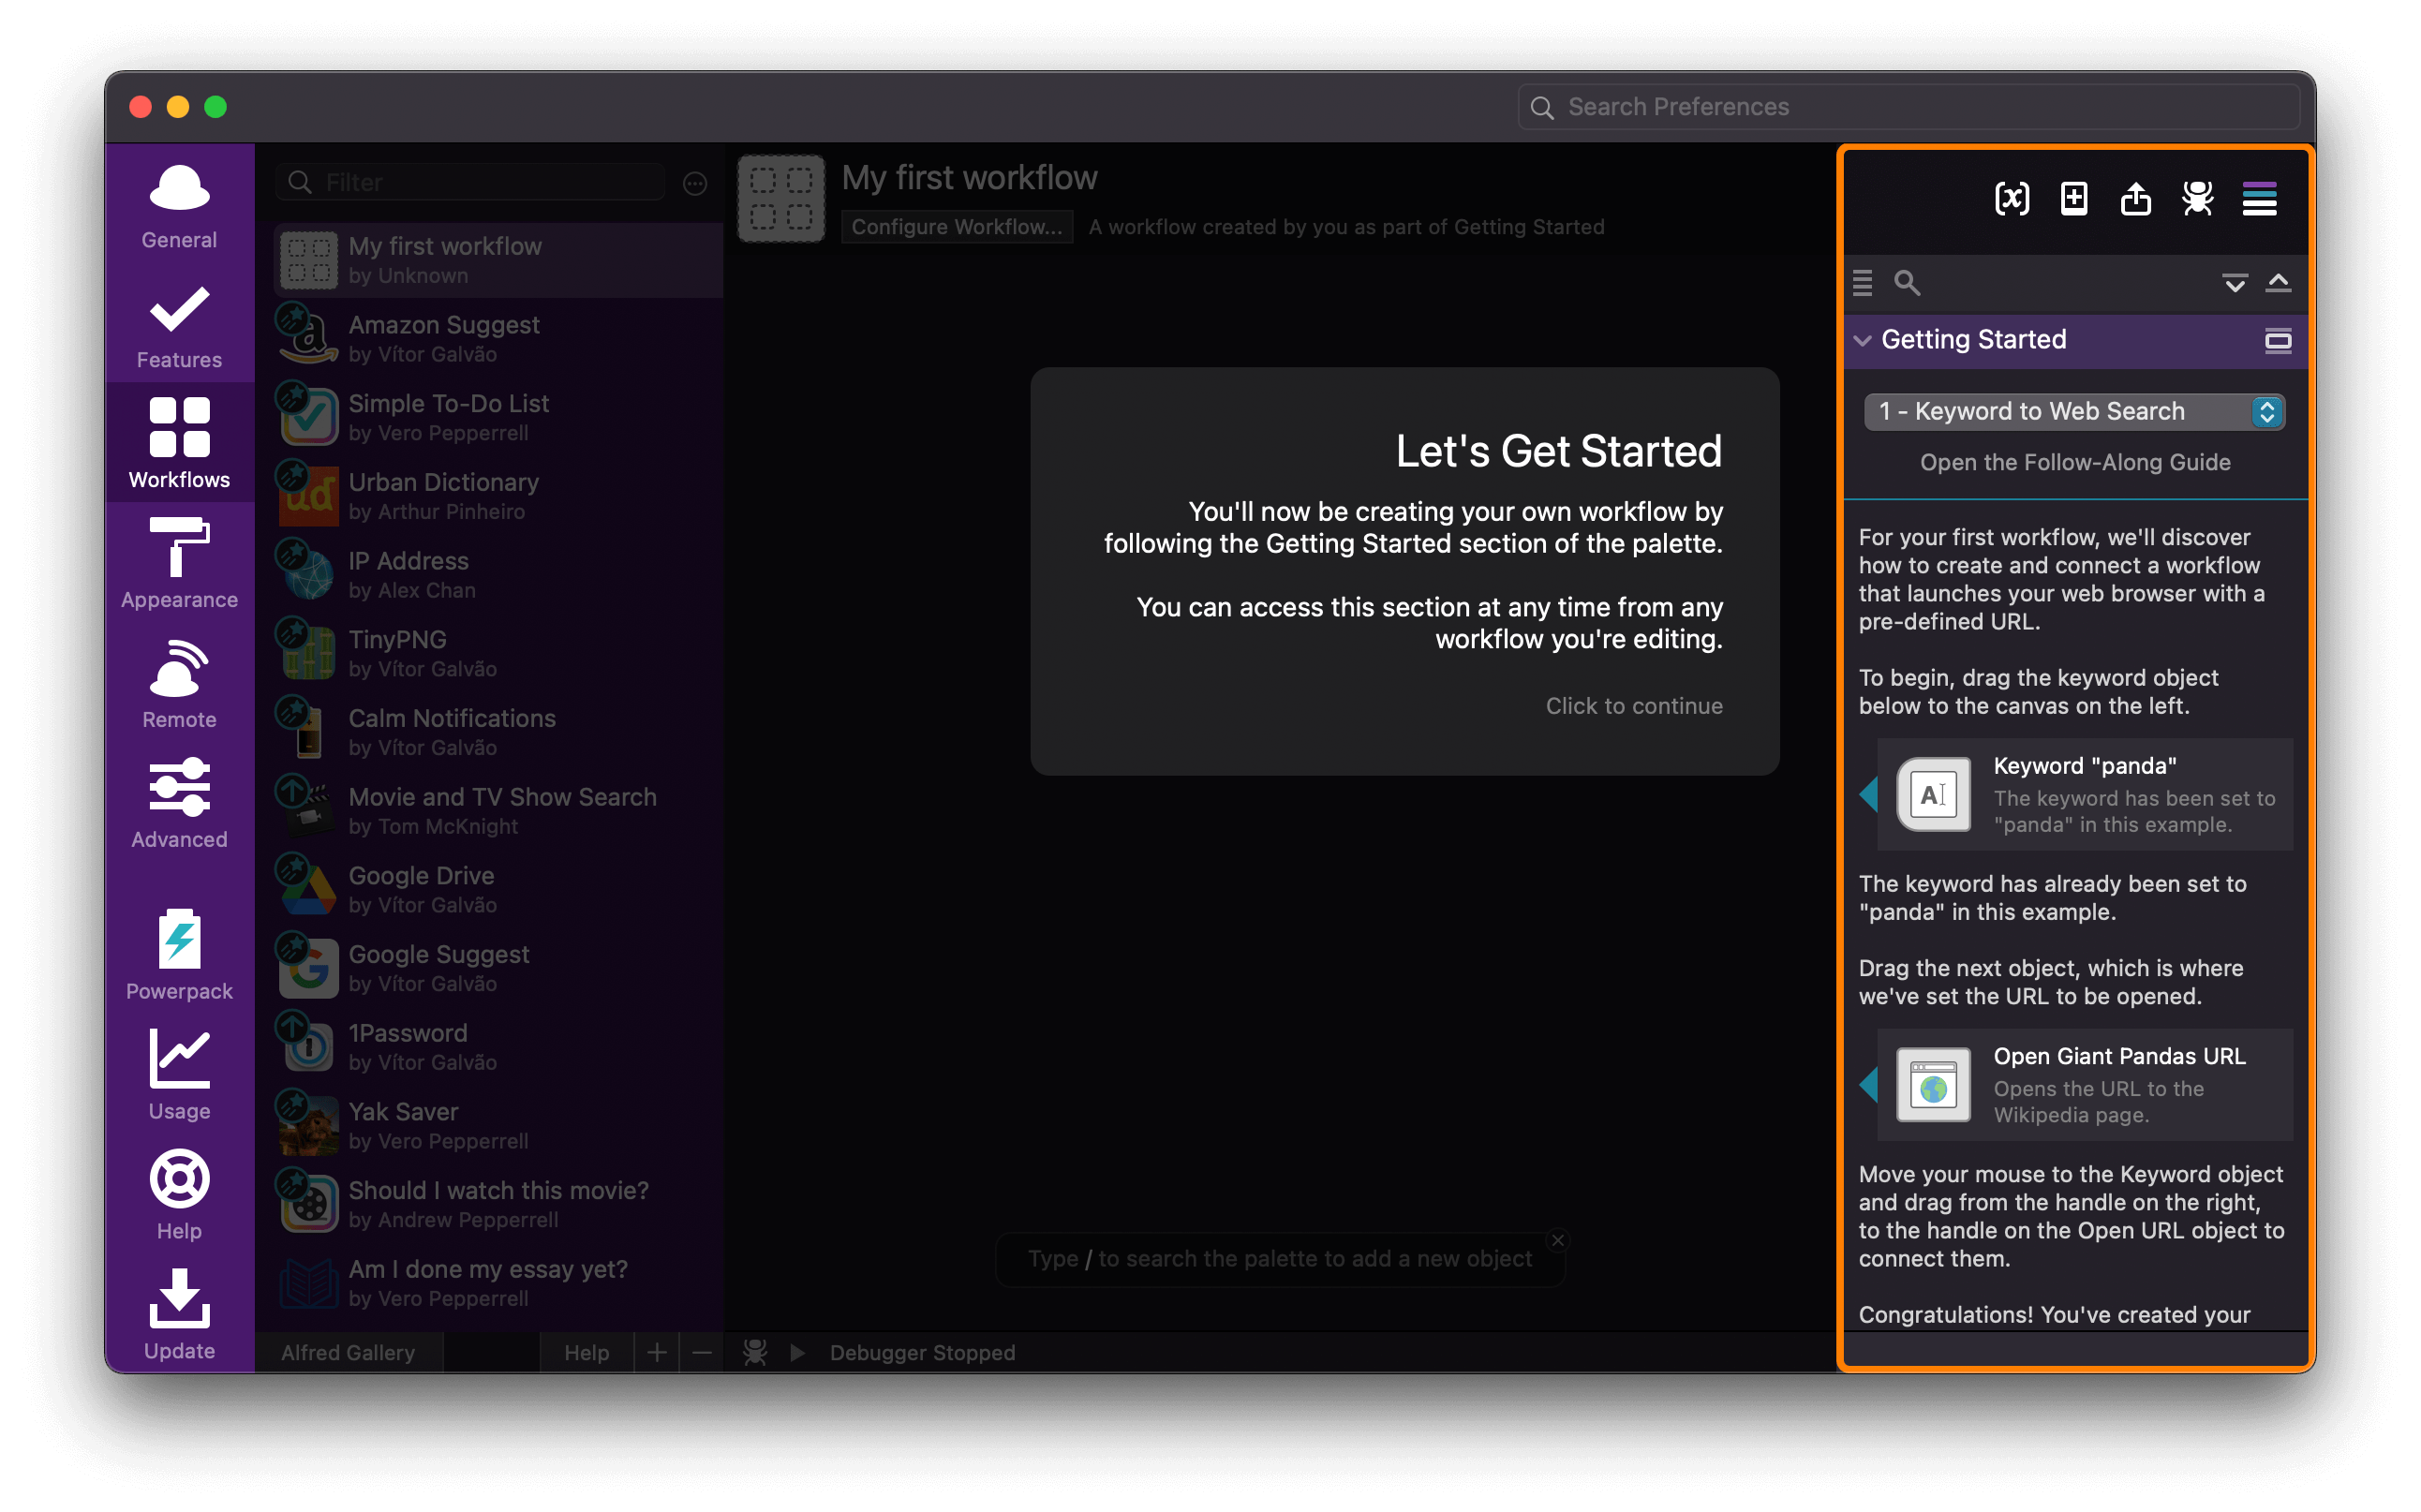
To begin, open Alfred's preferences to the Workflows tab and click the "Getting Started Guide":
There are four short guides covering different aspects. Each guide is also accompanied by a companion page with more details.
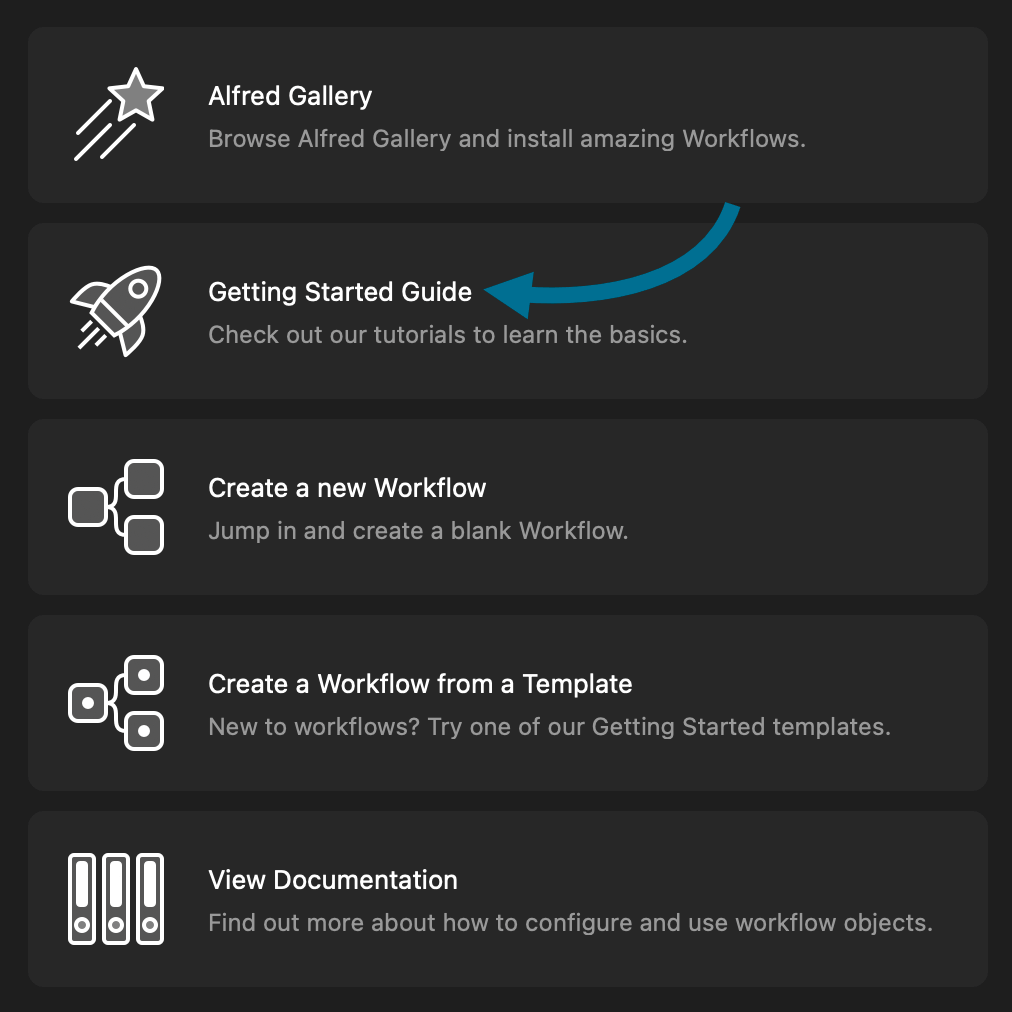
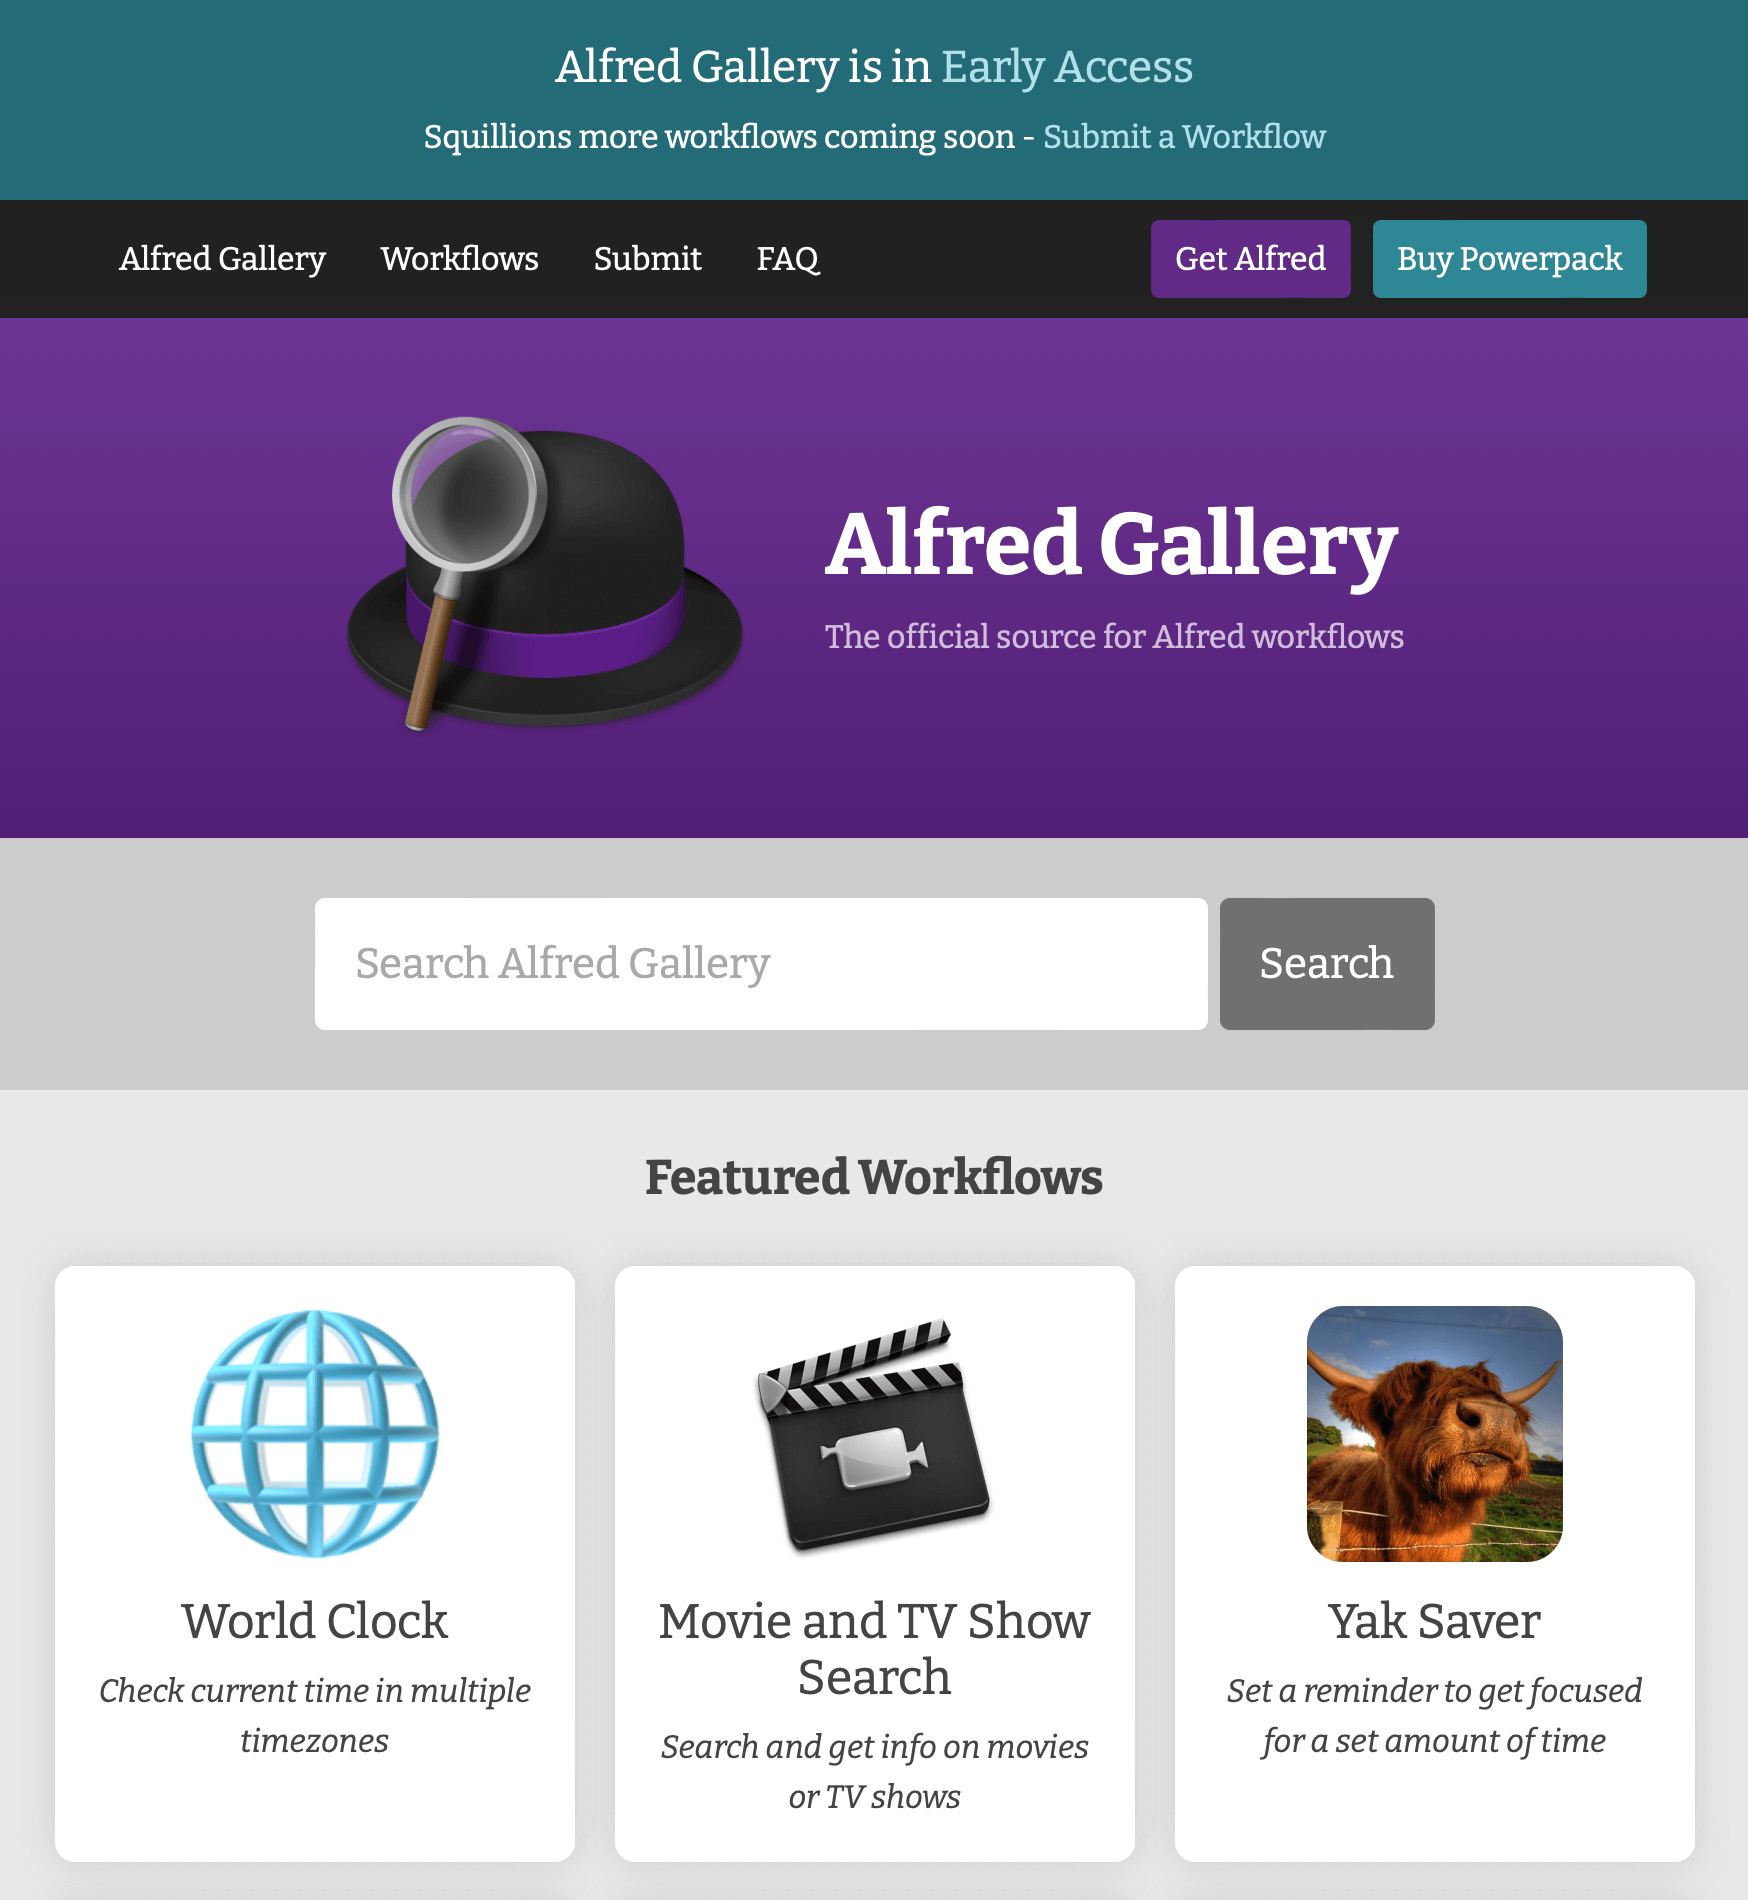
The Alfred Gallery
The Alfred Gallery is the official source for Alfred workflows, providing you with an easy and safe way to discover workflows created by our amazing community. All it takes is one click of the "Install in Alfred" button!
Take a look at the Alfred Gallery's "Learning" tag; We've identified some simple, script-free workflows you can use to understand how they're made.
As well as being tagged, they're also marked with the Learning icon in the top left.
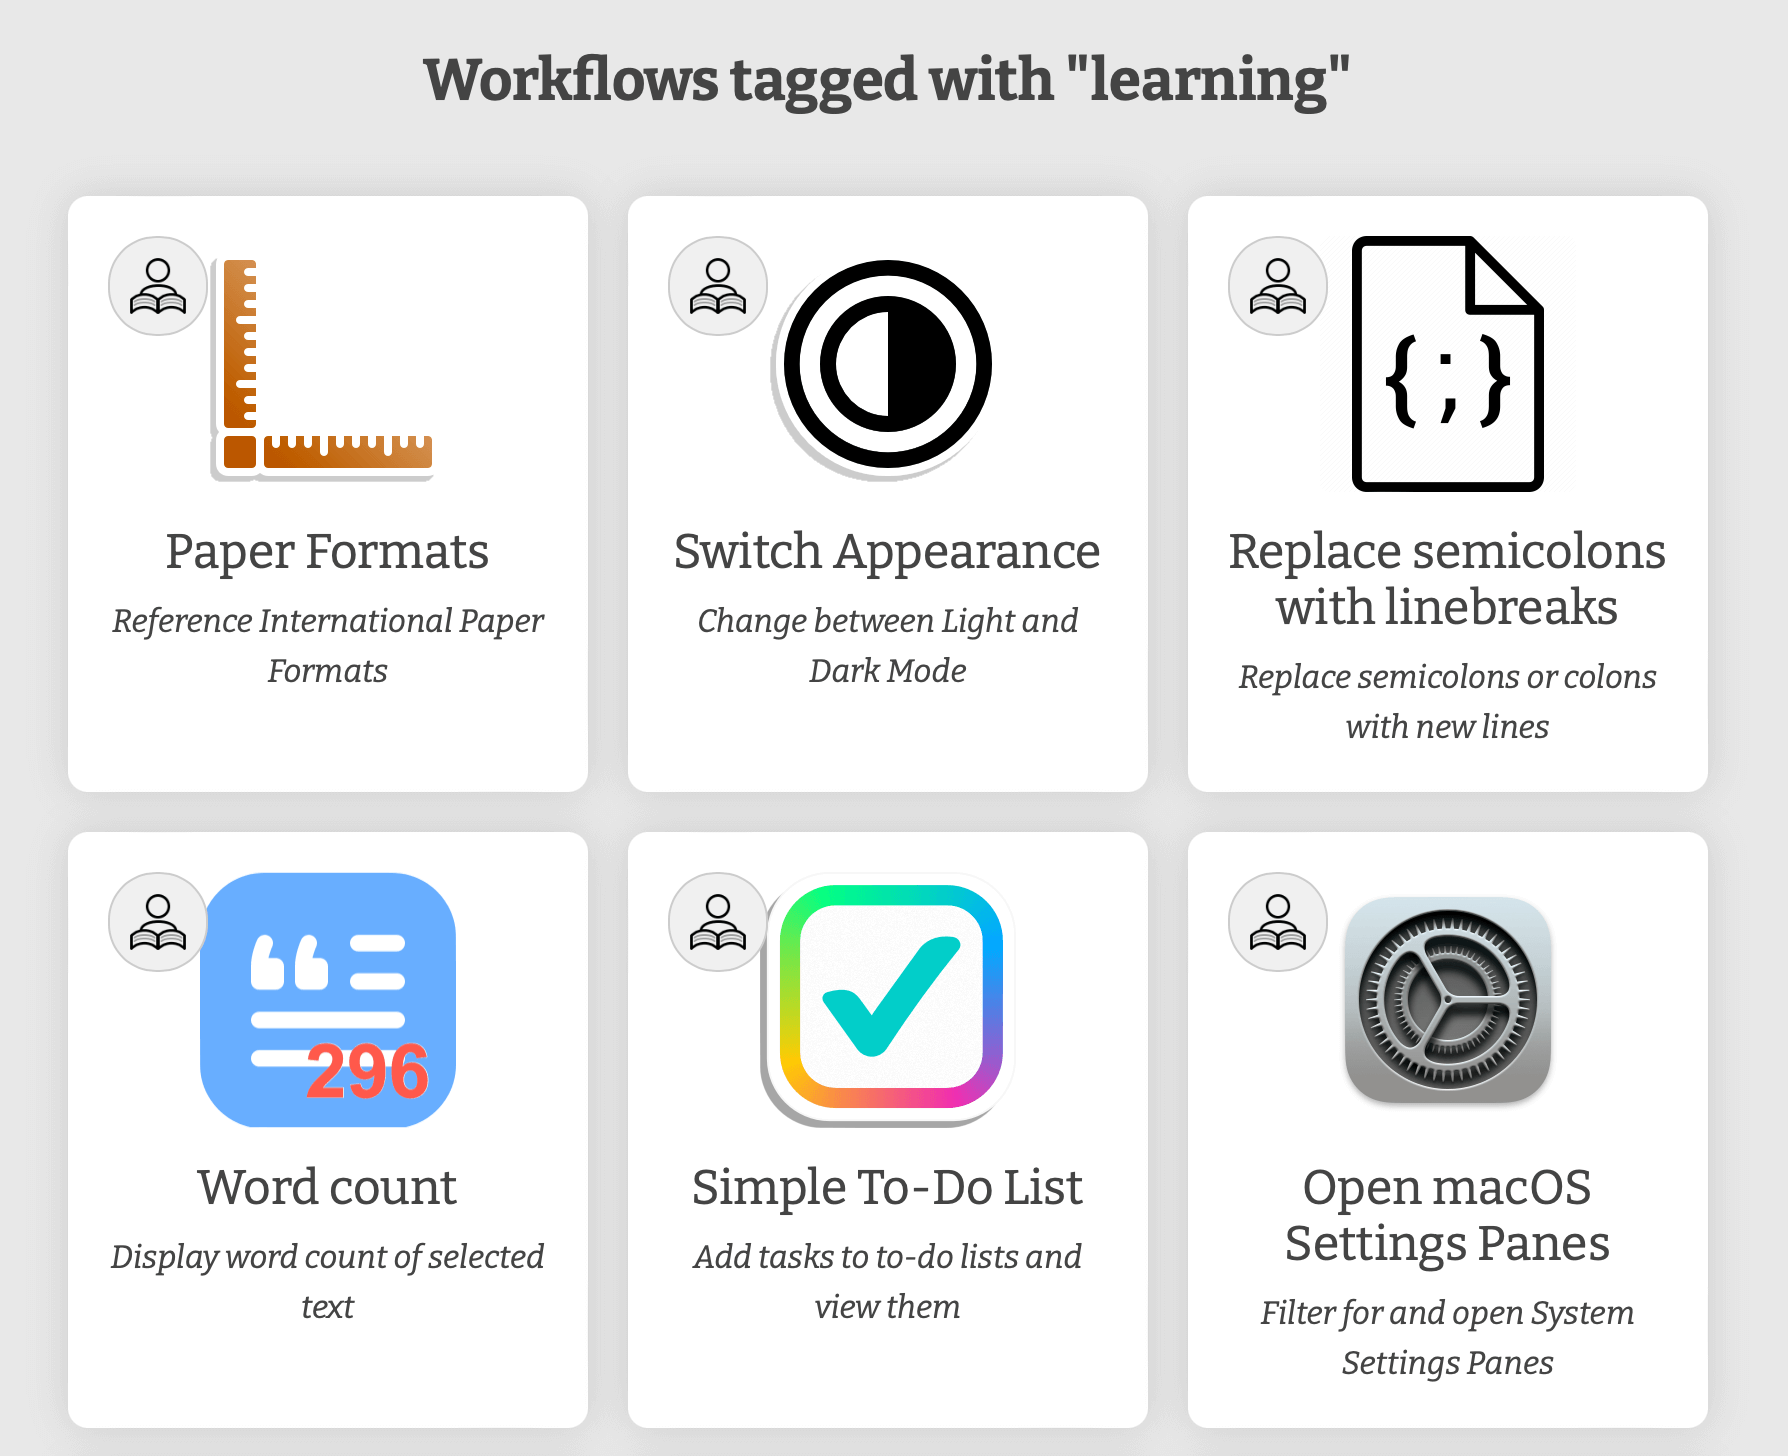
Some of the workflows include notes to guide you through what each object does.
Join our Community to Share Ideas
You can join the Alfred Forum if you have any questions while creating your workflows, or when you choose to share your creations with the community.
Since Alfred 5's release, we've busily been developing the Alfred Gallery platform, a new and official way to discover, install and update the fantastic range of workflows our community has been creating over the years.
Today, we're opening up the Alfred Gallery for early access for everyone to use! Simply update to Alfred 5.0.6 and navigate to alfred.app to get started.
What does Early Access mean?
We've already added almost 100 excellent workflows to the Gallery, with hundreds more already in review for adding over the coming months.
By opening up the Alfred Gallery early, it simplifies the process for our community to transition their workflows, adding pretty markdown intros, adding workflow user configuration, removing auto-updaters; All with the aim of bringing a consistent user experience for anyone using the Gallery.
Making Dependencies Easier
A small number of workflows require additional software or tools to operate; These will be highlighted as you browse the gallery.
Alfred 5.0.6 has made managing Homebrew dependencies simple with a new "Resolve Dependencies" process. If not already installed, this will guide you through the process of installing Apple's Dev Tools and Homebrew, then show you which Homebrew formulae need to be installed or updated for the Gallery workflows you have installed.
This also automates the process of installing missing languages such as php.
A Big Thanks to Workflow Developers
Alfred wouldn't be as amazing as he is without our incredible community of workflow developers; Alfred Gallery was created for you!
If you'd like your workflow to be included in the gallery, take a look at our submission page.
Alfred 4.8 is now available and brings improvements to support the changes in macOS Ventura, which was released recently.
Open Alfred 4's preferences to the Update tab to get the latest update.
Take a look at the Alfred 4 change log for all the details.
Last week, Apple released macOS Ventura to the general public and, so far, it is proving to be a fairly stable new OS.
One minor hiccup in Ventura is that the new System Settings feature appears to be unfinished; Many of the preferences are not currently searchable in the way they were in previous macOS versions. Apple may improve this in an upcoming update, otherwise we'll look at tweaking Alfred's search to add these results.
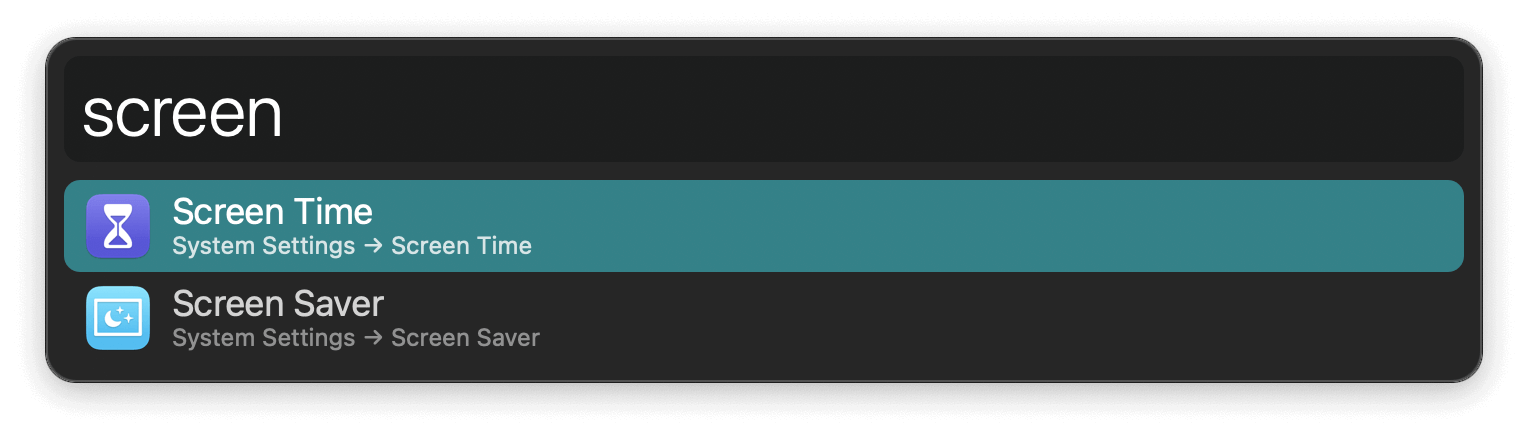
In the meantime, we've created a workflow to open System Settings panes via all of the usual keywords, such as bluetooth, passwords, wallet and so on.
You can Install the System Settings workflow from the Alfred Gallery and view the many keywords you can use.
If you have any questions about the workflow, you can pop by the forum thread.
We'd also like to tip our bowler hat to community member Stephen C who created a first workflow to open System Preferences in macOS 12, helping establish many of the valid URL schemes. We truly have the best community members! :)